
Selecting an appropriate tool for audio ducking operations demands considerable analysis. Your decision may land on either Wondershare Filmora or OBS Studio.
Audio editing features are unique per platform, while each service targets specific audiences. Sustained clear audio requires audio ducking because this technique automatically lowers background music when dialogue commences.
Don’t want to miss the best from TechLatest?
Set us as a preferred source in Google Search
and make sure you never miss our latest.
This article shows how each program interacts with audio ducking. We will guide you through detailed instructions and feature-focused comparisons to help you determine the most suitable tool for your specific project requirements.
Next, we explore these two formidable audio software programs.
Part 1: Wondershare Filmora: How Easily It’s Audio Ducking Feature Works?
Firstly, we will talk about the software program named Wondershare Filmora. The video editing software Wondershare Filmora provides both users and powerful features through its intuitive interface.
Filmora permits users of all abilities to create content through tools that simplify advanced video editing operations. Filmora’s automatic audio ducking capability stands out by using smart programming to decrease background music during dialogue sections.

Key Features of Filmora
Audio Ducking
The tool silently adjusts background music volume through automatic detection of dialogue. The functionality ensures your message maintains clear and easily understood audio quality.
Silence Detection
Filmora’s automatic “silence detection” identifies silent portions of your audio, which enables you to eliminate these intervals without any manual effort.
AI Voice Enhancer
Using this tool results in clearer voice quality that offers professional conference-like speaking even without manual dial adjustments.
Voice Cloning
With its advanced functionality, you can duplicate your voice using saved audio samples that enhance flexibility during audio editing sessions.
Audio Mixer
Users can effortlessly manage various audio levels through the interface because it enables smooth sound blending to improve audio product quality.
A step-by-step guide to using Filmora’s audio ducking feature:
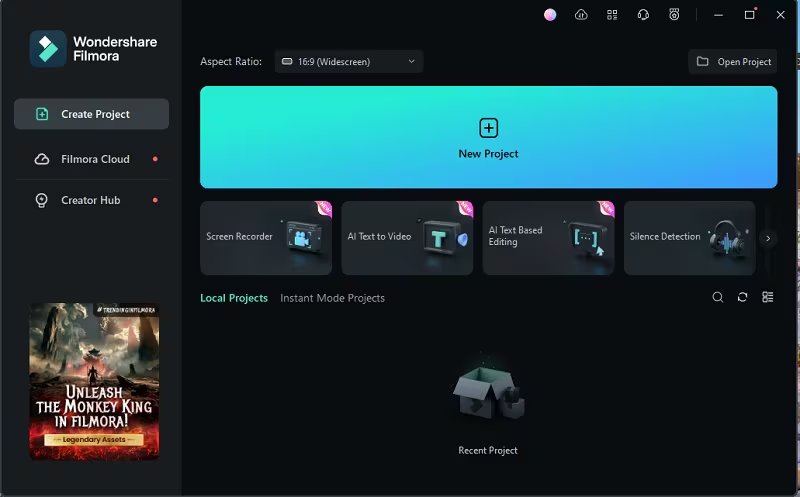
Step 1: Download and install Wondershare Filmora. Next, open the editing timeline by clicking New Project from the main window of Wondershare Filmora.
Step 2: Select your video/audio through either uploading method, which includes file importing or direct file dragging. Simply drop files onto the timeline area located beneath to start editing.

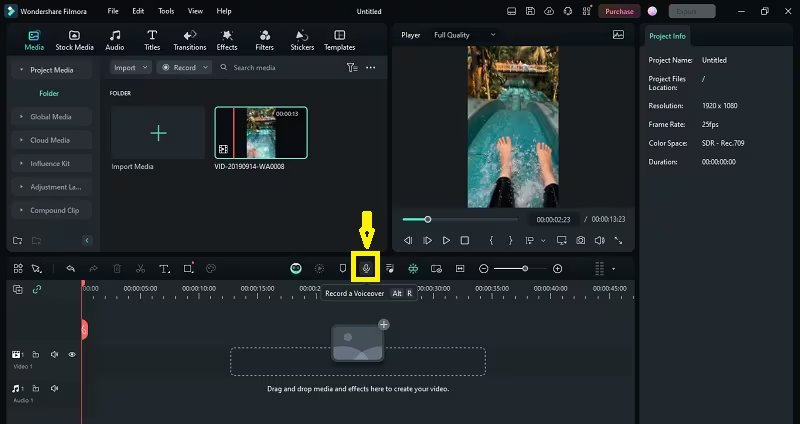
Step 3: You can select the recording option for voiceover from the Filmora interface. Start voice recording by clicking the voiceover icon.
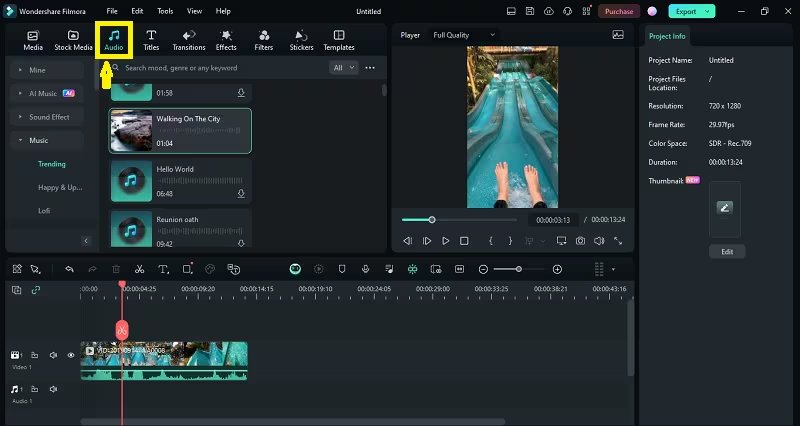
Step 4: The program lets you select free music further to your editing needs without allowing infringement on copyrights. To select your desired music, click Audio and navigate through the options available.
Step 5: After you import video and audio tracks to the Filmora timeline, the editing process can begin. Select the video in the timeline by right-clicking it, followed by selecting “Adjust Audio.”
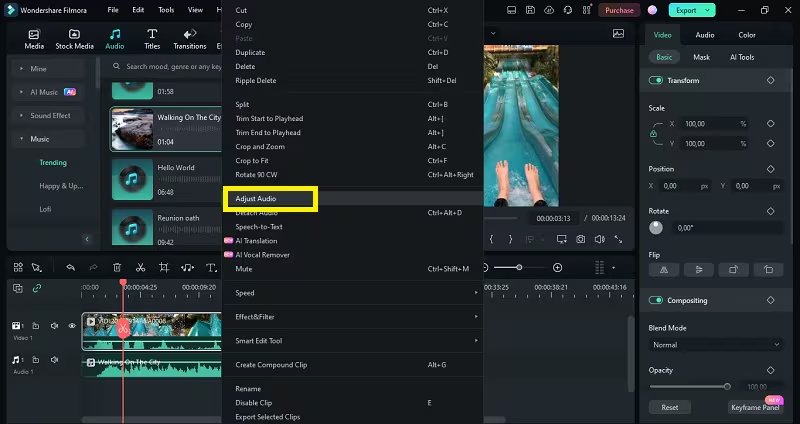
Step 6: The adjust audio menu appears next, and users should select “Audio Ducking” from the bottom display, followed by enabling the audio ducking capability. Users need to select a ducking level so other background clips in the video will receive lowered volume.
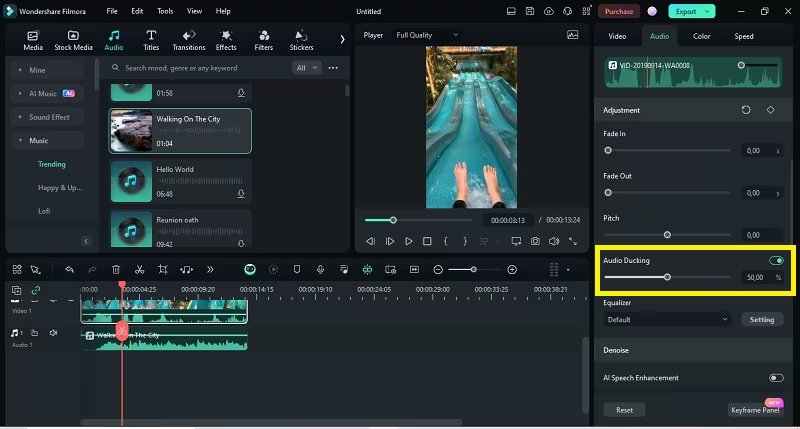
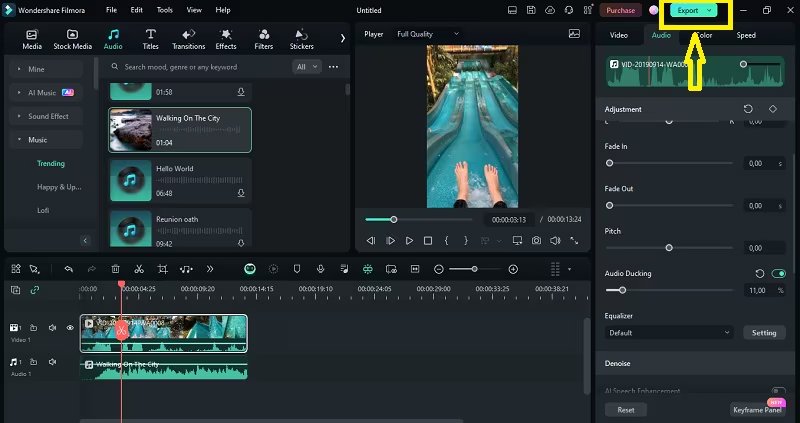
Step 7: Enabling the audio ducking feature while selecting a level for controlling background clip volumes became possible. After clicking “OK,” Filmora will proceed to balance the volume of your additional clips through its automatic process. You can click Export to save your result once you are satisfied with it.
By following the above-mentioned steps, users can perform audio ducking operations effortlessly in Wondershare Filmora, which provides all necessary creation tools regardless of their editing experience level.
Part 2: Step-By-Step Guide Using OBS Studio Audio Ducking Feature!
We should shift our focus to OBS Studio. OBS Studio emerges as a powerful open-source software through which live streaming and recording take place.
The software provides a combination of extensive audio features, including audio ducking that enables users to boost their real-time audio quality.
In OBS Studio, you can configure audio ducking as follows:
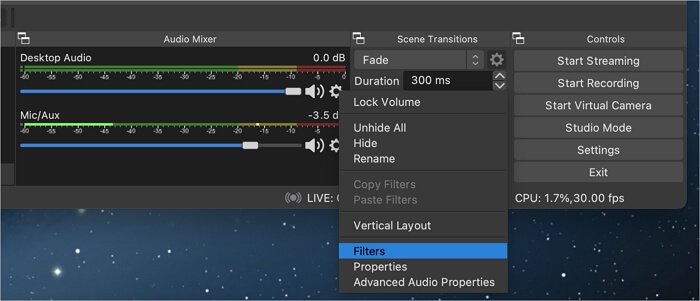
Step 1: Launch OBS from your computer desktop to begin recording videos or processing streaming sessions.Step 2: Click right on your audio mixer to open the drop-down volume selection menu, then choose “Filters.”
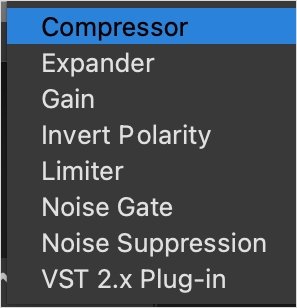
Step 3: Find the pop-up window, which then allows you to add filters by clicking the “+” tab.

Step 4: Continue by choosing “Compressor” and then continue to set a filter name, but you can also use the default selection.
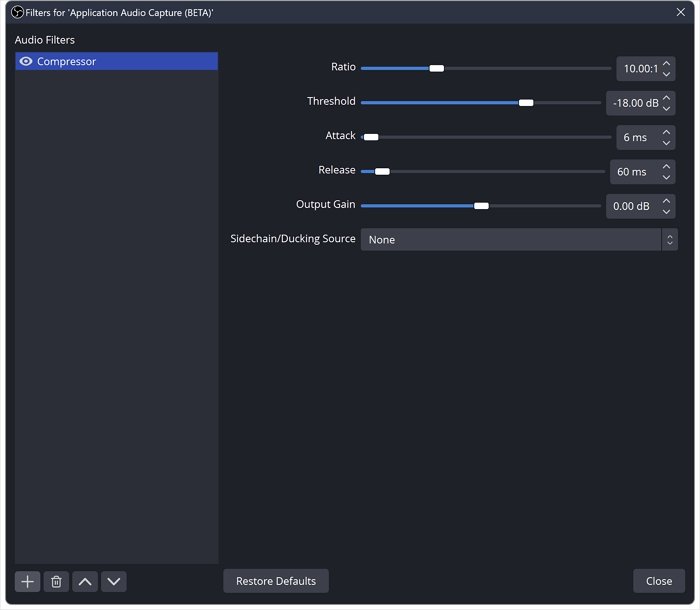
Step 5: Adjust the compressor settings. Users can set the threshold through OBS to trigger the ducking effect. A lower threshold value results in increased microphone sensitivity.
OBS Studio demands some technical experience to handle audio ducking yet its detailed control capabilities become essential for streaming and audio combination tasks.
Part 3: Which Suits You Best? Filmora vs. OBS Studio: Know the Key Features!
The knowledge of Filmora and OBS Studio’s audio ducking capabilities prepares you for making an informed selection. The two platforms present different strengths and weaknesses, which can be observed through the information below.
| Feature | Wondershare Filmora | OBS Studio |
|---|---|---|
| Ease of Use | Very user-friendly | Requires Technical Know-How |
| Pricing | Free and Paid versions are available | Free and Open Source |
| Compatibility | WindowsMacOSAndroidiOS | Windows 10, 11MacLinux |
| Best For | Content Creation and Editing | Live Streaming and Recording |
| Audio Ducking | Automatic and Intuitive | Detailed but Complex Setup |
Wondershare Filmora shines with its simple UI and automation. They help beginners who want basic video editing. To manage audio in OBS Studio, users must learn its unique streaming features. They have a steep learning curve.
The unique requirements you need to address will determine your decision. Wondershare Filmora offers a complete video editor. It has powerful tools and is easy to use.
Conclusion
To choose between Wondershare Filmora and OBS Studio, you must know your requirements. Wondershare Filmora is great for new video editors. It has an easy-to-use interface and automatic audio reduction.
Powerful features and convenient tools combine to deliver an enhanced editing experience. OBS Studio gives live streamers great audio control. However, it needs skilled operators because its learning path is complex.
Wondershare Filmora’s editing solution is easy to use. It has powerful features and great audio. It enhances content. You can start your editing adventure now with Filmora. It will boost your content quality.
Enjoyed this article?
If TechLatest has helped you, consider supporting us with a one-time tip on Ko-fi. Every contribution keeps our work free and independent.
Support on Ko-fiDirectly in Your Inbox


