
If you’re trying to play Valorant and experiencing an error message TPM 2.0, which states, “This build of Vanguard requires TPM version 2.0 and Secure Boot to be enabled in order to play”. So, don’t worry – I’m here to help you.
A TPM 2.0 error can occur in Valorant when Secure Boot is disabled in Windows 11.
When you don’t have TPM 2.0, and Secure Boot enabled on your PC, you get the dreaded Vanguard TPM 2.0 error that locks you out of Valorant.
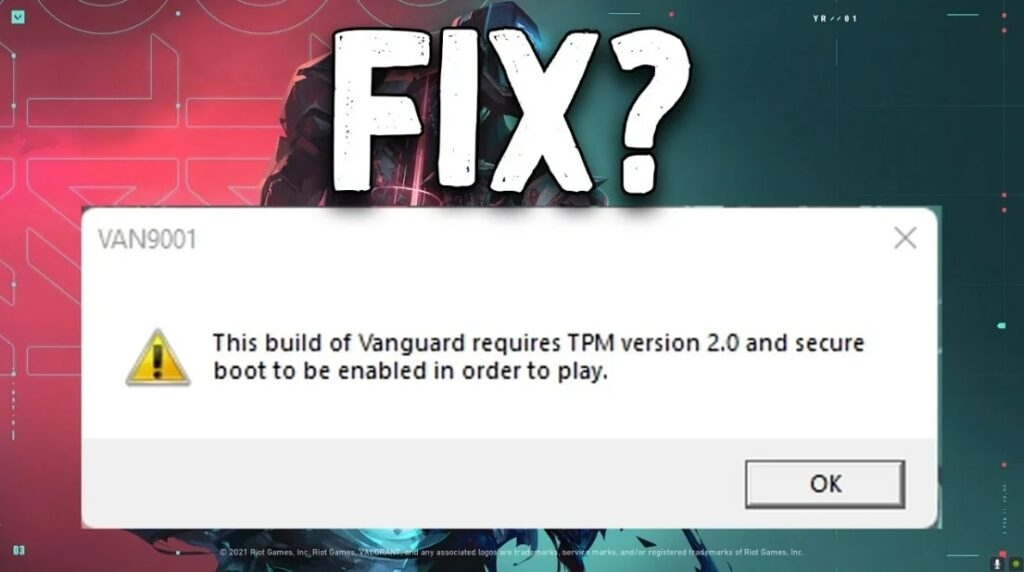
Many Valorant players have reported issues with Secure Boot and TPM 2.0 since upgrading to Windows 11. If you get the TPM 2.0 error in Valorant, don’t panic.
In this post, we’ll walk you through the steps to fix this error and get you back into the game.
So without further ado, let’s get started!
Why Does The TPM 2.0 Error Occur In Valorant?
When you want to play Valorant on Windows 11, you’ll need two key components known as Secure Boot and TPM 2.0.
Secure Boot and TPM 2.0 are technologies that provide extra layers of security for your PC, making sure malicious software can’t get onto your system.
When these features are enabled in Windows 11, Valorant can run more securely and efficiently.
Unfortunately, when Secure Boot is disabled or if you don’t have TPM 2.0, the game will present you with an error message when you try to launch it.
However, A system that does not support any of these features will not be able to run Valorant.
A feature of UEFI’s latest Unified Extensible Firmware Interface (UEFI) is Secure Boot, which protects users from security threats.
Using Windows 11 requires the use of TPM 2.0 hardware security measures. In most cases, this error affects players who use preview versions of Windows 11.
How To Fix The TPM 2.0 Error in Valorant?
If you’re experiencing an error related to TPM 2.0 in Valorant, you need to follow these steps:
Enable TPM 2.0 And Secure The Boot
The first thing you need to do is make sure that Secure Boot and TPM 2.0 are enabled on your system.
You’ll need to access the BIOS on your PC or laptop to do this.
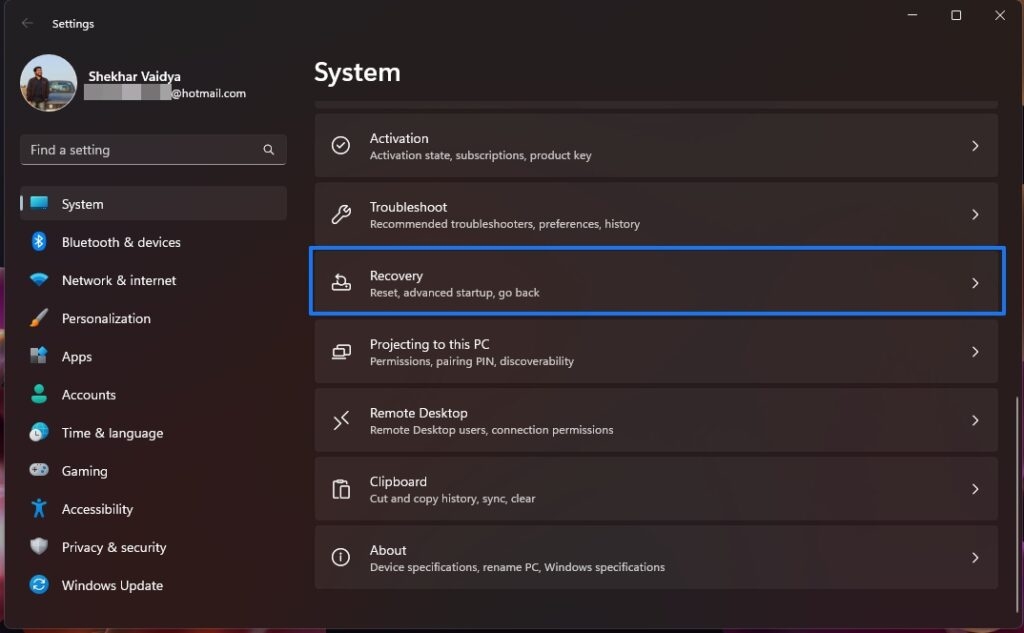
- First, navigate to Settings, then click on recovery.
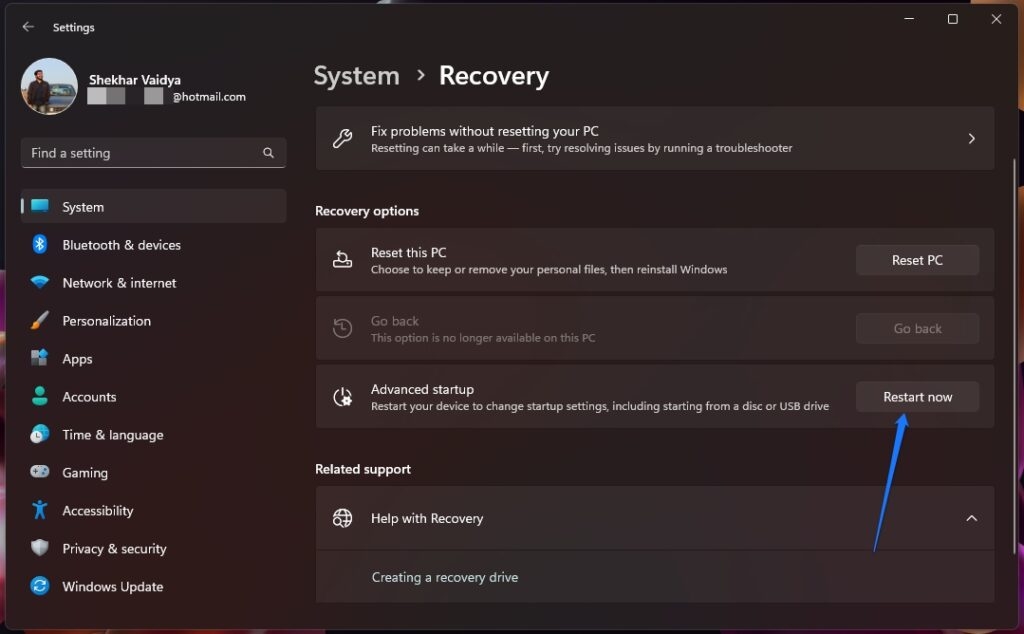
- After that, click on Restart Now in the Advanced Startup section.
- Hit the DEL or F2 key to bring up the BIOS menu when you reboot your computer.
- Now, Choose to Troubleshoot > Advanced Options > UEFI Firmware Settings, and click Restart.
- By doing this, you will gain access to the BIOS.
- Once in BIOS, make sure it is in advanced mode, and then make sure that TPM is enabled.
- In AMD builds, this will display as TPM, while in Intel builds, it will appear as PTT.
- After you’ve enabled TPM, locate Secure Boot. It is usually located under a Boot option, but this can vary. After finding the Secure Boot option, enable it. You must set Secure Boot to Standard after enabling it.
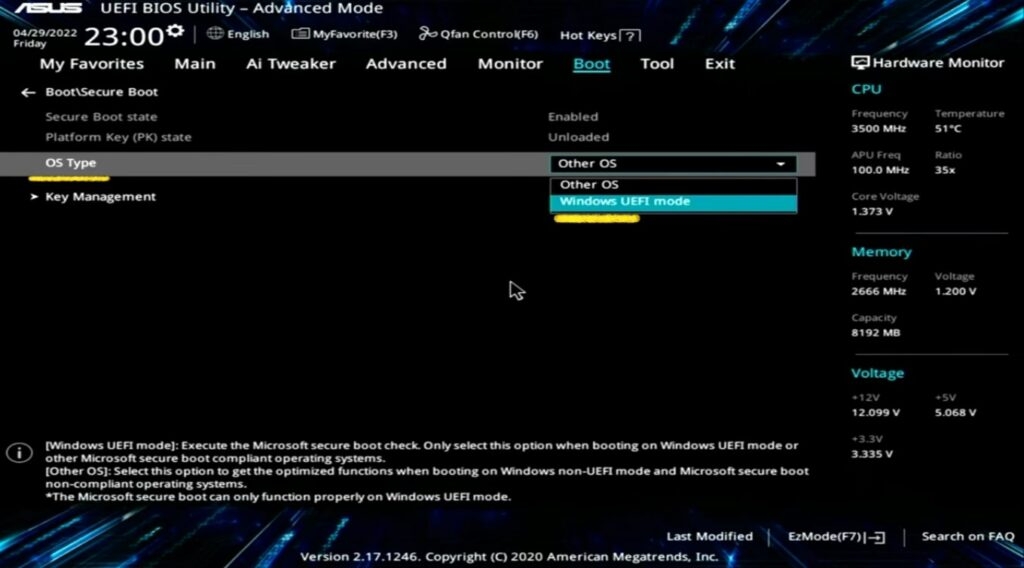
- Once you’ve done this, Save changes & exit, and reset your computer.
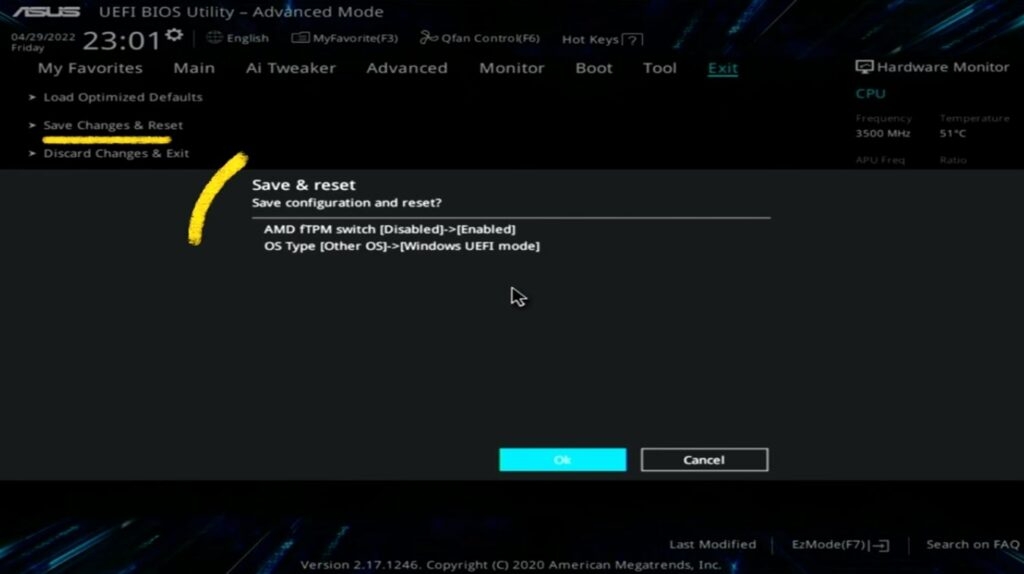
Now try launching Valorant again – if everything’s been configured correctly, the error message should no longer appear, and you’ll be able to play.
If you’re still having issues, it may be worth checking your PC’s hardware compatibility with Valorant – even if Secure Boot and TPM 2.0 are enabled, some older systems may not have the necessary minimum requirements to run the game.
Disable Discord’s Automatic Boot
Many users were able to fix the issue quickly by disabling the Discord app’s automatic startup.
You should definitely give this method a try if you have the app set to start automatically when Windows boots up.
- First, open the Start Menu and type Discord in the search box. To open Discord, click on the Discord tile in the search results.
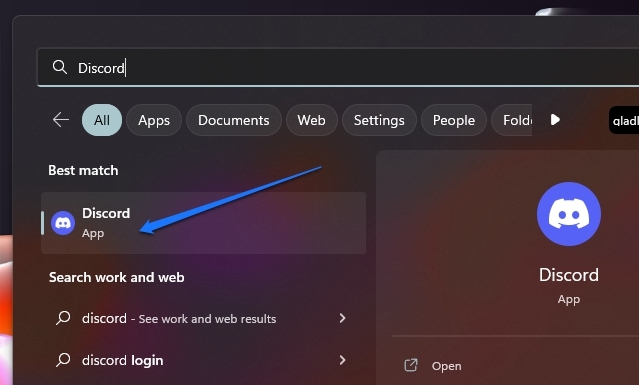
- Now, click the User settings icon present at the bottom right corner of the left sidebar on the Discord window.

- Then, scroll down the left sidebar of the Settings screen and click the Windows settings tab to continue.
- After that, in the right section of the window, click the toggle button next to ‘Open Discord‘ to turn it off.
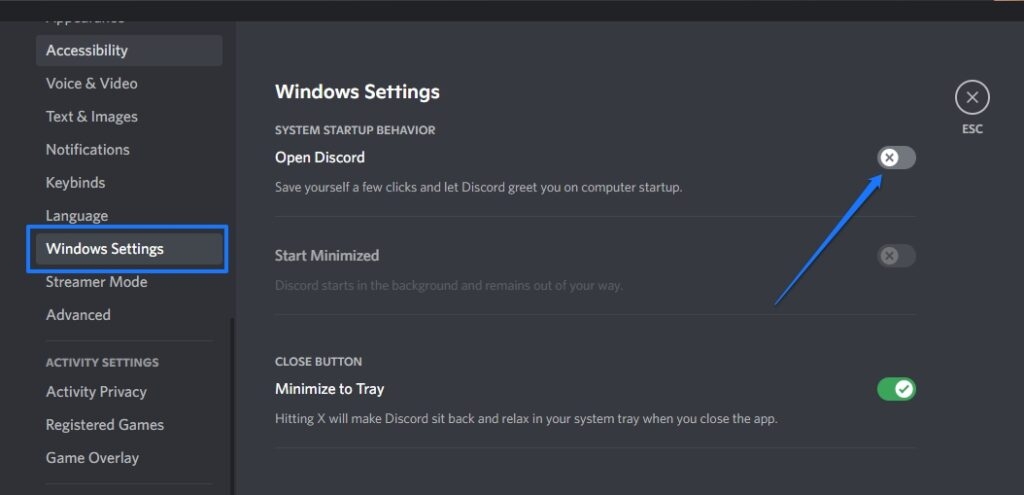
- Now, as a precaution, disable its access to Task Manager access as well.
- To do so, click the Start Menu and type Task Manager to find it. Next, click the Task Manager tile in the search results. Otherwise, you can also open it by pressing Ctrl+Shift+Esc on your computer.
- Now, to proceed, click on the Startup Apps icon on the Task Manager window.
- After that, click on the ‘Discord’ listing in the Startup Apps window to select it. Next, select Disable at the top right of the window in order to disable the app on startup.
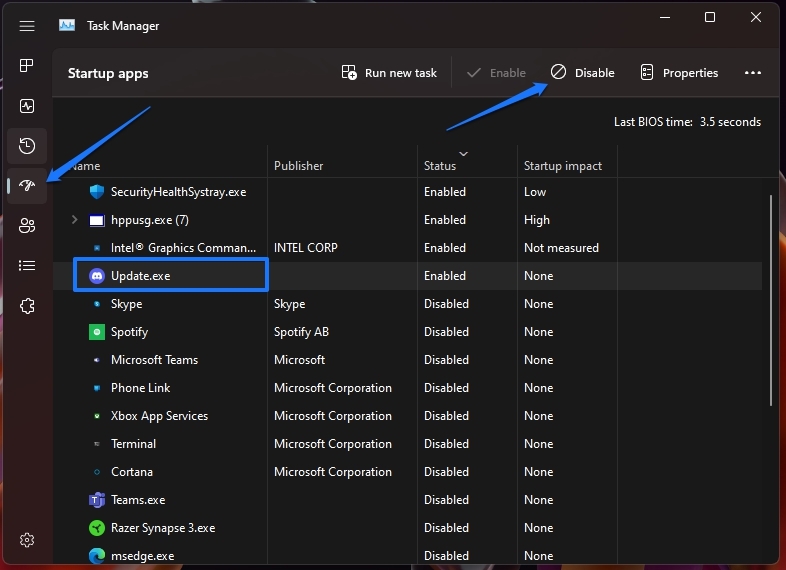
- After you have disabled the app, try running the game again to see if the problem has been resolved.
Check For Windows Updates
You should check to make sure that all the latest Windows updates are installed on your system.
To do this, go back to the Windows Update tab in settings, and click on the “Check for Updates” button.
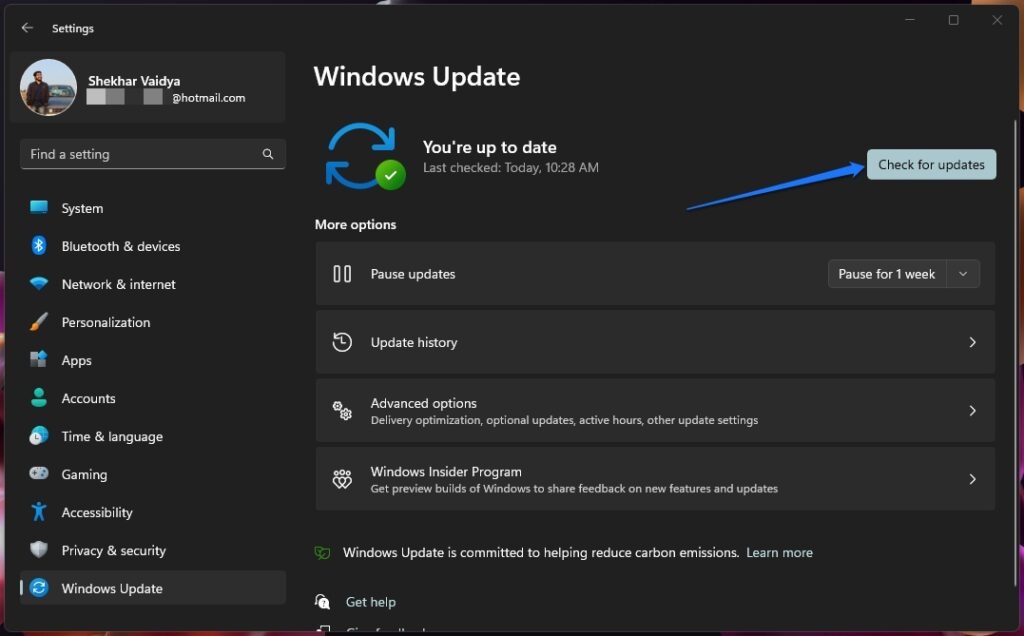
If any updates are pending, download and install them, then reboot your computer and launch Valorant again.
Hopefully, this will fix the TPM 2.0 error, and you’ll be able to start playing Valorant again.
Contact Valorant Support
If all else fails, contact Valorant support for help. You can reach out to them on their official website or through the game’s official then submit a ticket for the TPM 2.0 error.
Afterward, the support staff will give you an answer to your problem that wasn’t solved after following the instructions above.
The team is available around the clock and will be more than happy to assist you in resolving your issue with the TPM 2.0 error in Valorant.
Conclusion
With that, we’ve come to the end of our guide on how to fix the TPM 2.0 error in Valorant. Hopefully, one of the steps we outlined above will help you get back to playing the game.
Make sure you have Secure Boot and TPM 2.0 enabled in your BIOS, as well as make sure that all the latest Windows updates are installed, and you should be up and running again in no time.
If you have any further questions or feedback regarding this troubleshooting, feel free to let us know in the comment section below. We’re always here to help you!
Thanks for reading!
Directly in Your Inbox


