Highlights
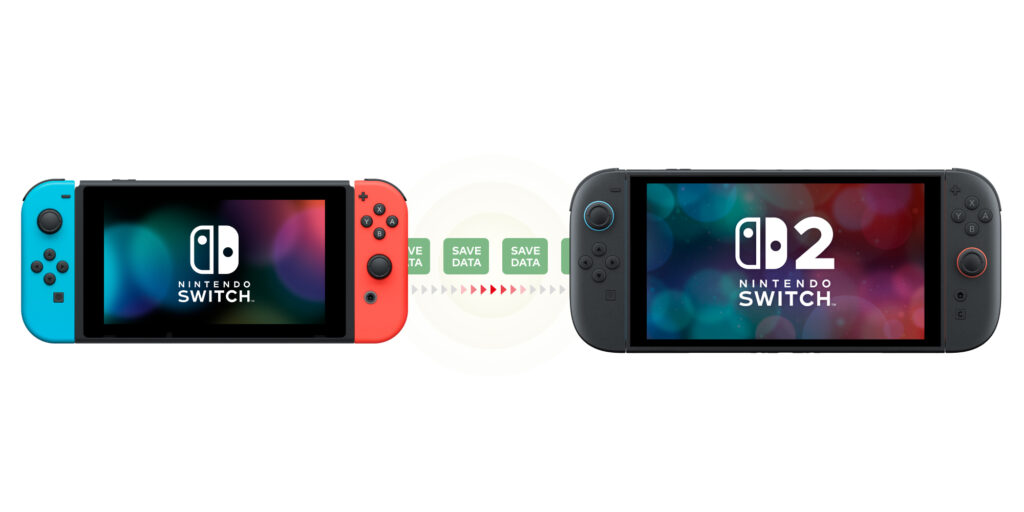
- Are you updating to the Nintendo Switch 2? Don’t leave your game saves, profiles, and digital purchases behind!
- It’s easier to transfer your old data from the original Switch to the new system than you might think, as long as you know how to do it correctly.
- This guide will detail everything you need to know to transfer your games, saves, screenshots, and settings to the Switch 2 without losing data.
After the release of Switch 2, one of the first questions players will be asking is likely, how do I transfer my games, save files, and settings from my current Nintendo Switch (whether it’s an original Switch, a Switch Lite, or a Switch OLED) to the new Switch 2?
Now, thanks to a very significant firmware update, Nintendo has made this process way less painful. In this guide, we take you through everything you’ll need to know about how to transfer data from Nintendo Switch to Switch 2.
Don’t want to miss the best from TechLatest?
Set us as a preferred source in Google Search
and make sure you never miss our latest.
Content Table
How do you transfer your data from the Nintendo Switch to the Switch 2?
If you are looking to upgrade and you cannot afford to lose your save files, profiles, game progress, or settings, then this article is the comprehensive and easy-to-follow guide to completing a perfect data transfer.
Why Data Transfer Matters?
Before we go into the how, let’s first explore why a data migration process is so absolutely crucial:
- Preserve Your Game Progress: Hundreds of hours invested in games such as Zelda: Breath of the Wild, Animal Crossing, and Pokémon deserve to be easily transferable.
- Retain Your Digital Purchases: The games you’ve purchased on the Nintendo eShop will remain attached to your Nintendo Account, but you want to access those without manually redownloading everything.
- Continue Your Subscriptions: Things like Nintendo Switch Online and saved data backup should be able to go uninterrupted.
- Family Accounts: If you have multiple profiles (especially for kids or other members of the family), correctly migrating each user’s data is essential.
What Can Be Transferred?
- User Profiles
- Save Data (both local and cloud)
- Installed Games and Downloadable Content (DLC)
- Nintendo eShop Balance and Purchases
- Game Settings and System Preferences (in some cases)
Note: For certain games, data movement may be limited for security and game design purposes (e.g., limits to the use of Pokémon Home). Do not forget to see whether any games require additional instructions to migrate.
How to Enable System Transfer on Your Nintendo Switch
So, before you do anything, you’ll need to verify that your Nintendo Switch is updated enough to have access to the System Transfer feature. Here’s how you can do that:
Step-by-Step Guide to Update Your Nintendo Switch
Here are the steps that you need to follow:
- Ensure your device is connected to a reliable Wi-Fi network.
- From your Home screen, click the gear icon to get to settings.
- Scroll down and choose System, and then System Update.
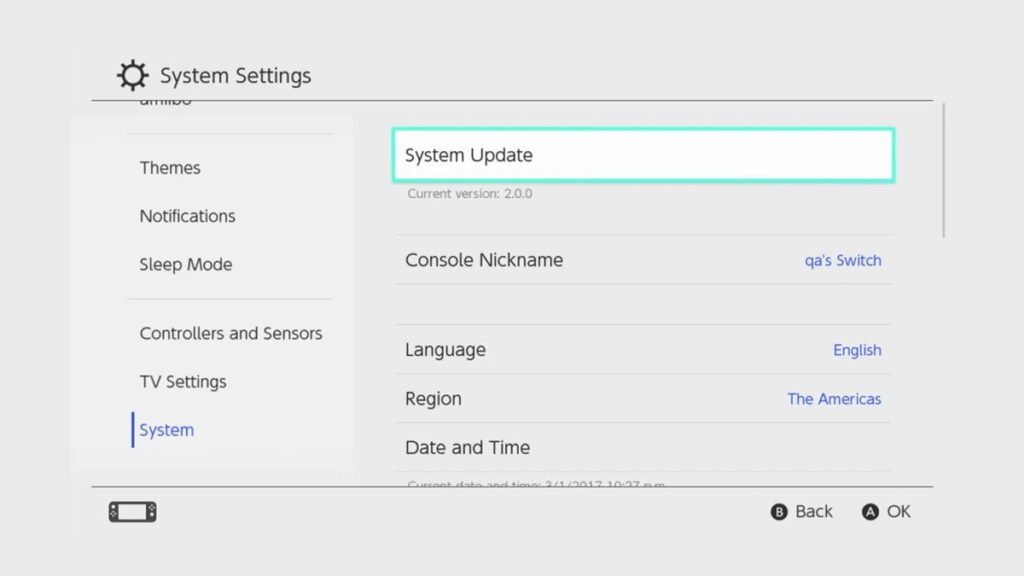
- Your Switch will then begin scanning for the most recent firmware. Download and install version 20.0.0 or later, if one is available.
- After installation, restart the console to apply the update.
The 20.0.0 update isn’t just about the System Transfer, though, as it also adds cool features like virtual game cards and more options for sharing games between Switch models, including the Switch 2.
How to Transfer Data from Nintendo Switch to Switch 2
After you’ve updated your existing console and are ready to make the move, do this:
Requirements:
- Active internet connection
- A Nintendo Account linked to your user profile
Step-by-Step Instructions:
- On your old Switch, open up the Home Menu and navigate to Settings.
- From System → System Transfer → Transfer to Nintendo Switch 2.
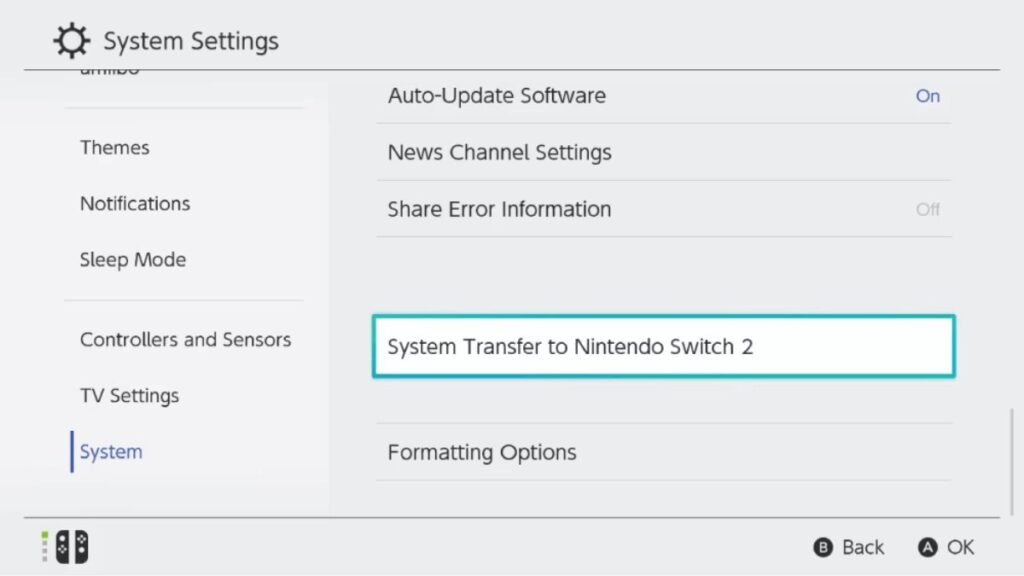
- Tap Next > OK to continue.
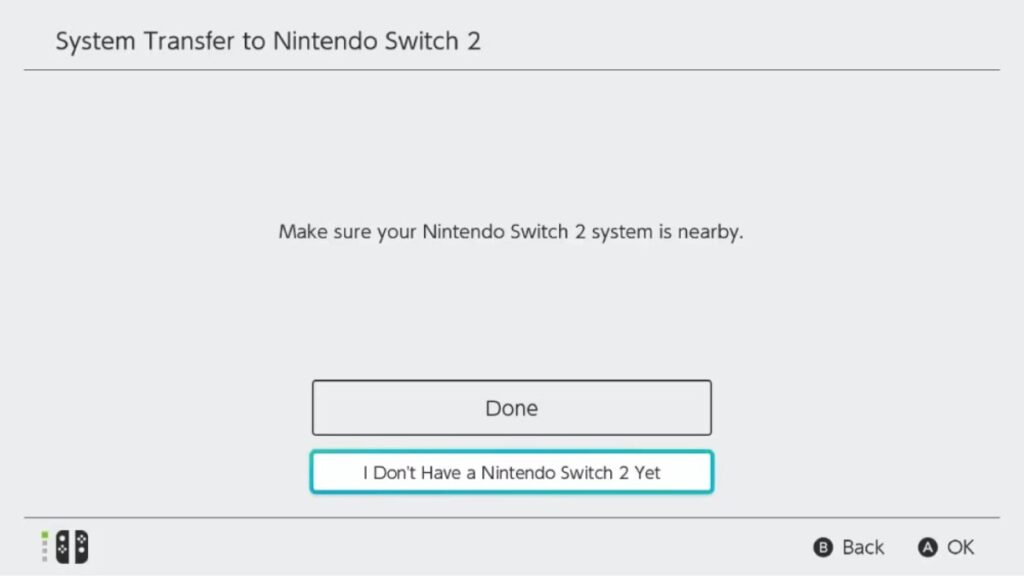
- Choose “I Don’t Have The Nintendo Switch 2” (as this is uploading data to Nintendo’s server temporarily).
- Review the transfer details.
- The system will show a summary of what’s moving and what’s not. Carefully read through this.
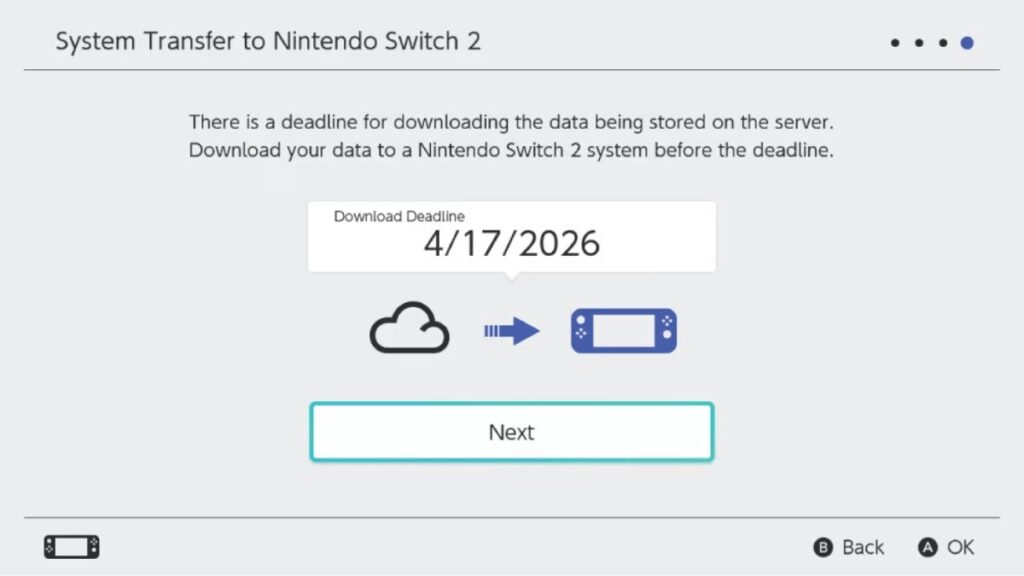
- Note the Download Deadline.
- So here’s the deadline by which you need to have your data downloaded to Switch 2. Failing to meet the deadline would result in automatic cancellation of the transfer.
- Tap Next, then fill in the verification code that was sent to you.
- Now, hit Upload Data.
- Your console’s data will be securely uploaded to Nintendo’s servers. Please NOTE: This way you are using your internet bandwidth, so speed is a factor.
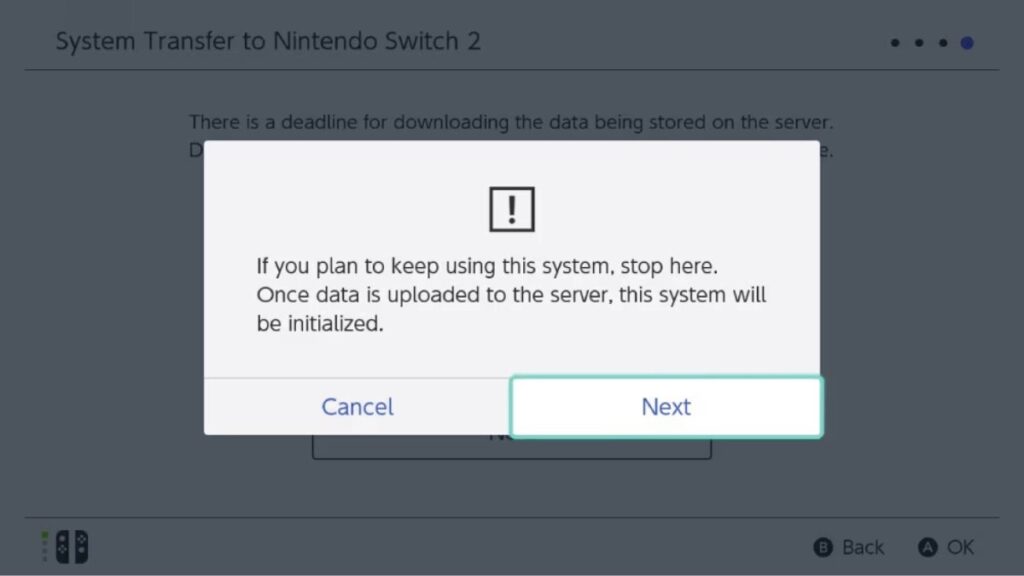
- In the end, select Start Initialization.
- But remember, this will delete all save data on your old Switch for every user profile. Back up anything important before doing so.
That’s it! Your data is now prepared to be transferred to your shiny new Switch 2.
How to Cancel a System Transfer
If you change your heart halfway through? No problem. Yeah, you can cancel an in-progress system transfer even if you uploaded your data to the server. Here’s how you can do it:
Canceling the Transfer:
Here are the important steps that you need to perform to cancel the transfer:
- Turn on your Nintendo Switch.
- At the Select Time Zone screen (which you see during first-time setup), simultaneously press the left or right stick and the + or – button on your Joy-Con.
- Sign in to your Nintendo Account.
- Ensure it’s the same account you used to start the system transfer.
- Simply follow the onscreen steps to cancel the transfer.
If you cancel, then your original system settings and data will be restored to the Switch you uploaded from.
But others, like parental controls, virtual cards, or digital downloads, may require manual reactivation.
How to Monitor System Transfer Status Online
I’m not sure if your submission is acceptable or if there is a problem. You can monitor the status easily with a PC or smartphone. Follow these steps:
- Open a web browser and visit the Nintendo Account website.
- Select the Nintendo Account associated with the System Transfer, and click Sign in.
- Once you are inside, go to Game Systems.
- Click on System Transfers.
In this section, you’ll see any active transfers, pending downloads, or history of completed transfers associated with your account.
Final Thoughts
Nintendo has made it a whole lot easier to shuttle your universe from the first Switch to the Switch 2.
With nothing more than an internet connection and a bit of shrewdness, you can be up and running on your new console without compromising your unsaved games, progress, or profile.
As long as you’re updated, your Nintendo Account is live, and you complete the transfer before the cut-off date, you’re good to go to see everything that the Nintendo Switch 2 has to show you.
Enjoyed this article?
If TechLatest has helped you, consider supporting us with a one-time tip on Ko-fi. Every contribution keeps our work free and independent.
Support on Ko-fiDirectly in Your Inbox
: Which BIOS Mode Should You Use?")


