
Did you ever face a situation where you are connected to the internet but unable to access any website on your browser? This is a common networking issue most people face in Windows 10.
If you ever face a “No internet secured” error on your system, follow the methods mentioned below to solve it.
Don’t want to miss the best from TechLatest?
Set us as a preferred source in Google Search
and make sure you never miss our latest.
Ways to Fix the “No Internet, Secured” Connection Error
Method 1: Reset the Windows 10 Configuration
This is one of the basic fixes which you can try to solve the “No internet secured” issue on your system. For this, you need to flush the local cache and then reset the network configuration of Windows 10.
Here is how you can reset the configuration:
- Firstly, right-click on the ‘Start Menu’ and then select the ‘Windows Powershell (Admin)’ option.
- Now, select ‘Yes’ when the Windows prompts ‘allow this app to make changes.’
- Enter the following commands in the same sequence (in case the command fails, go with the next one):
ipconfig /flushdns
ipconfig /release
ipconfig /renew
netsh winsock reset
netsh int ip reset
- After entering all the commands mentioned above, reboot the system and check if your internet access is restored or not.
Method 2: Disable Your VPN
Have you connected to a working Wi-Fi connection but still see the error “No internet, secured”? Don’t worry, this happens even when you have VPN software turned on your system.
The built-in security features of the VPN sometimes block the internet. This feature is usually seen as a ‘kill-switch’ in most VPNs.
To fix this issue, we recommend you disable or exit the VPN application and reconnect to the Wi-Fi connection.
Method 3: Change your Wi-Fi Connection Property
To change the Wi-Fi properties, follow the below-given steps:
- Hold the Windows logo + R button and type the command “ncpa.cpl” and hit ‘OK.’
- Now, you can see the “network connections” popup.
- Right-click on your Wi-Fi connection and select “properties”.
- Make sure all the options shown in the boxes are enabled with a tick mark.
- Now, click the network icon and see which Wi-Fi connection is causing the error.
- Unplug the cables from the modem.
- Now, keep the system in airplane mode.
- Turn off the power to the router and wait for at least 5 minutes.
- Now, turn the power on and plug in the cables to the router.
Check if the internet is now working correctly on your system or not.
Method 4: Modify the TCP/IP Properties
Sometimes, the TCP/IP settings also might trigger the ‘No internet, secured’ issue. To fix that, follow the steps below:
- Hold the Windows logo + R button and type the command “ncpa.cpl” and hit ‘OK.’
- Now, you can see the “network connections” popup.
- Right-click on your Wi-Fi connection and select “properties.”
- Now, click on the TCP/IPv4 or Internet Protocol 4 option.
- Select the option “obtain an IP address automatically” and the same for the DNS server.
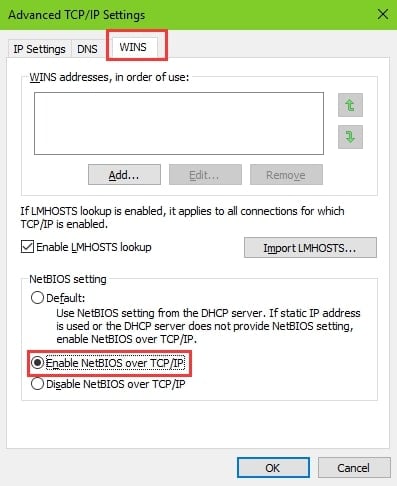
- Now, when you click on the ‘advanced’ tab, you can find the tab ‘WINS.’
- At the bottom, select the option “enable NetBIOS over TCP/IP” and hit enter.
Close all the dialog boxes and wait for a few minutes. Now, open the browser and check if the internet is working fine or not.
Method 5: Reset Winsock
Winsock is a command line that helps you to fix the Windows sockets API. This command line is responsible for your PC to interact with the TCP/IP and other network services.
To use this command line, first, go to the ‘run’ program by pressing the Windows logo + R button.
Now, type ‘netsh winsock reset catalog’ and hit enter for the command to run.
Method 6: Disable IPv6
IPv6 is a network protocol that is more advanced than IPv4. Though IPv6 runs on most of the hardware configurations, sometimes it causes errors.
To disable the IPv6 on your system, follow the process below:
- Firstly, go to the ‘Network and Internet Settings.’
- Now, click on the ‘change the adaptor options’ and go to ‘Properties.’
- From the list of the options being displayed, simply untick the option ‘Internet Protocol Version 6 (TCP/IPv6)’ and hit enter.
After completing the above settings, restart your system.
Method 7: Set up a New DNS Server
Every system comes with a default DNS server that helps in internet connectivity. However, there might be cases where the default DNS settings might not work, and you might face a ‘No internet, secured’ error.
To fix this issue, you need to set up a new DNS server by following the process as given below:
- Go to the ‘Network & Internet Settings’ and click on the ‘change the adaptor options’ and click on the ‘Properties.’
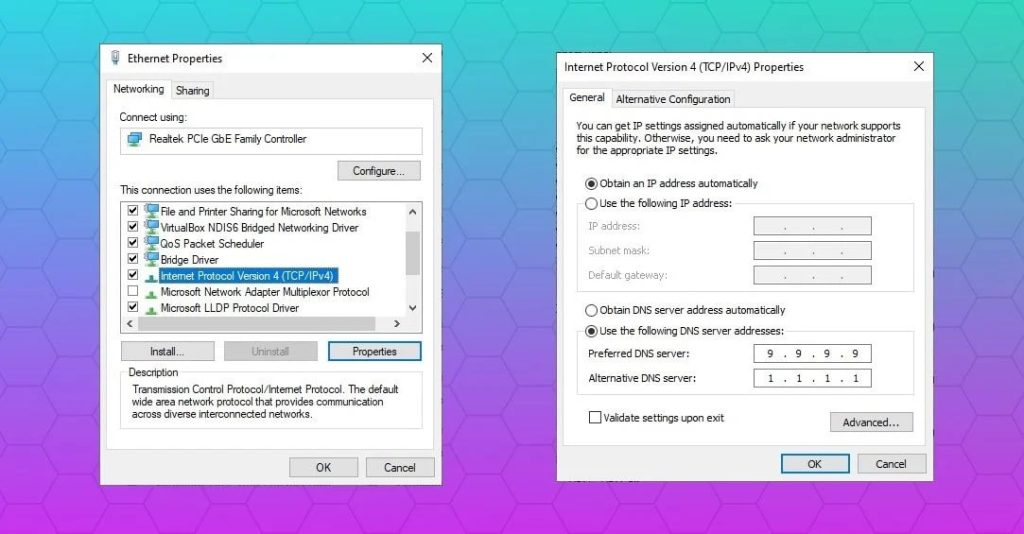
- Now, select the option ‘Internet Protocol Version 4 (TCP/IPv4)’ and go to ‘Properties.’
- In the DNS server address, input the following values:
- Preferred DNS Server: 9.9.9.9
- Alternative DNS Server: 1.1.1.1
- Now, press ‘OK’ and apply the settings.
Restart the system after applying the above settings. Now, the ‘No internet, secured’ issue must be fixed.
Method 8: Disable 5Ghz to Fix the Error
Most of the current generation laptops support both 2.4Ghz and 5GHz wireless network connectivity. A firmware update or any driver update might have caused the ‘No internet, secured’ error.
Disable the 5GHz band to fix this issue. For that, follow the below steps:
- Firstly, press the ‘Windows + X’ button and select the ‘Network Connections.’
- Now, select the ‘change adapter options.’
- Double-click on the wireless network you are connected to > go to properties > and click on the ‘configure’ option.
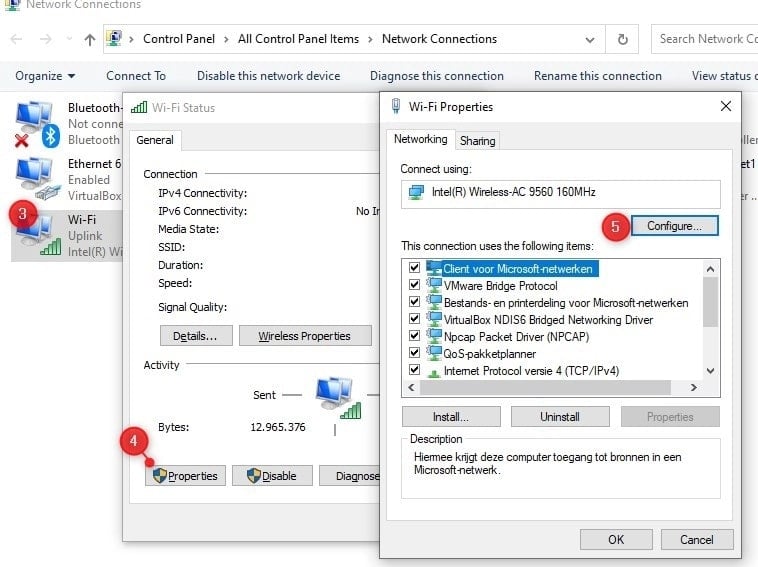
- Now, open the ‘Advanced’ tab and go to the ‘802.11n/ac’ option, and set it to ‘Disabled.’
- Press ‘OK’, and the system automatically connects to 2.4GHz
Method 9: Change the Power Plan Settings
Power saving mode in Windows 10 can cause the ‘No internet, secured’ issue sometimes. To fix this issue, follow the process below:
- Press the ‘Windows + X’ key.
- Go to ‘Power Options’ and select the ‘Additional Power Settings’.
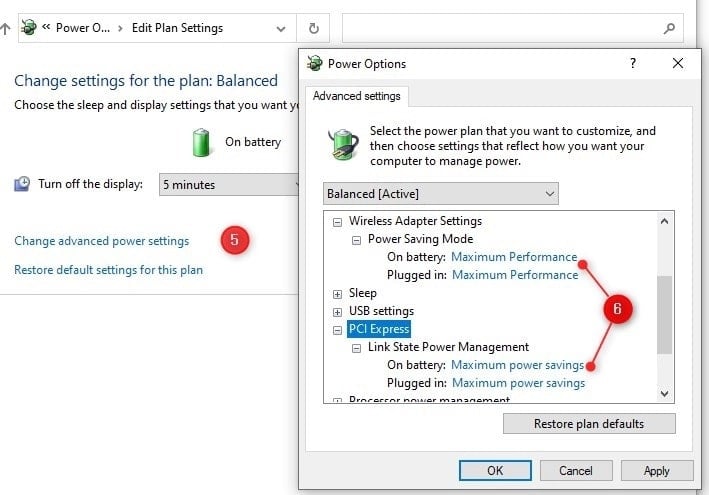
- Now, select ‘Change Plan Settings’ and go to the ‘Advanced Settings.’
- The ‘Power Saving Mode’ should be set to maximum performance. Apply the same settings to the ‘Link State Power Management’ option.
- Now, click ‘Apply’ and close the popup.
Restart the system after applying these settings.
Method 10: Switch from Wi-Fi to Ethernet
Since this issue is mostly related to Wi-Fi connectivity, make sure to disconnect from the Wi-Fi and switch to the Ethernet connection.
If the internet works, then the issue is with the router or your network drivers. Try to reset the configuration of the router.
Method 11: Run Network Troubleshooter
In case there is any misconfiguration in the Windows 10 settings, you might face the ‘No internet, secured’ error. To fix this issue, you need to run a network troubleshooter by following the process below:
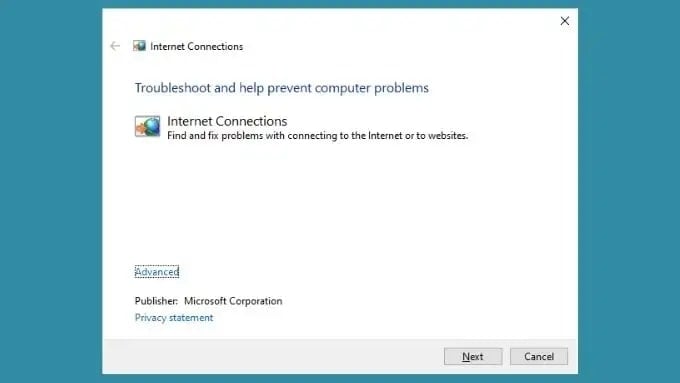
- Open the start menu and type ‘Find and Fix Network Problems’ (as shown in the image below).
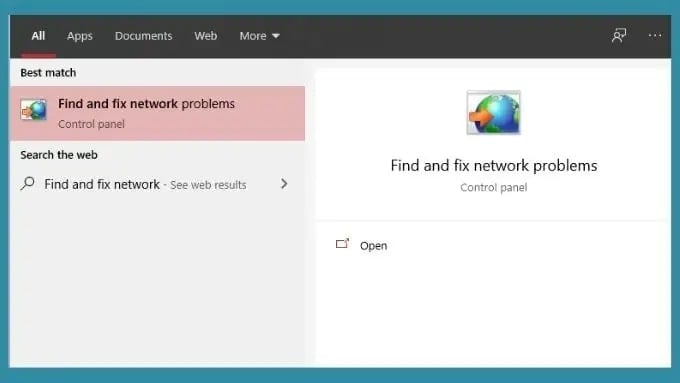
- Click on ‘Next’ and run the troubleshooter.
In case there are any errors found while troubleshooting, it gets fixed automatically. If not, you need to look for the errors manually and fix them.
Conclusion
The ‘No internet, secured’ option is common among Windows users. You can fix it by following either of the methods given above. Since there are multiple reasons that can trigger this issue, you need to try the above fixes one by one manually.
Enjoyed this article?
If TechLatest has helped you, consider supporting us with a one-time tip on Ko-fi. Every contribution keeps our work free and independent.
Support on Ko-fiDirectly in Your Inbox


