In Minecraft, everything is made up of pixelated blocks. It reduces the number of polygons needed to create an object in a game, making it easier to render. Nevertheless, a powerful PC or device is still required to run the game smoothly.
It is quite a simple game, but it tends to load computers, especially RAM, quite heavily on entry-level and mid-range models. In Minecraft, you need more RAM if you don’t have enough virtual memory or RAM to save in-game processes.
However, in case you don’t know how to add or allocate more RAM to Minecraft, make sure to read and perform the steps we have mentioned further in this article.
How Much RAM is Needed for Minecraft?
First, let’s understand how much RAM is actually required to play Minecraft fluently before we talk about how to allocate more RAM.
It depends on what mode you are playing and what type of installation you have in Minecraft, and what amount of RAM you need. In Minecraft, you should be able to run without any mods or external plugins, even if you have 2 GB of RAM.
When mods are introduced to the game, things change drastically. Mostly, mods are designed to improve the game’s look, which has a significant impact on its performance. Depending on the type and number of mods you are installing, you might need anywhere between 4 to 8 GB of RAM.
You may not always be able to run the game smoothly, even if your computer has sufficient RAM capacity. If you want to install Minecraft on your computer, you will need to check the RAM allocation for Minecraft.
Even if your computer has 32 GB of the fastest RAM modules, you won’t get the best performance if you only have 2 GB of RAM allocated to Minecraft.
How to Allocate More RAM to Minecraft
If you want to know how to add more RAM to Minecraft, you must perform the steps given below:
- Go to the “Installations” tab in the Minecraft Launcher.
- To allocate RAM for a specific version of Minecraft, click the three dots on the right, then select “Edit.”
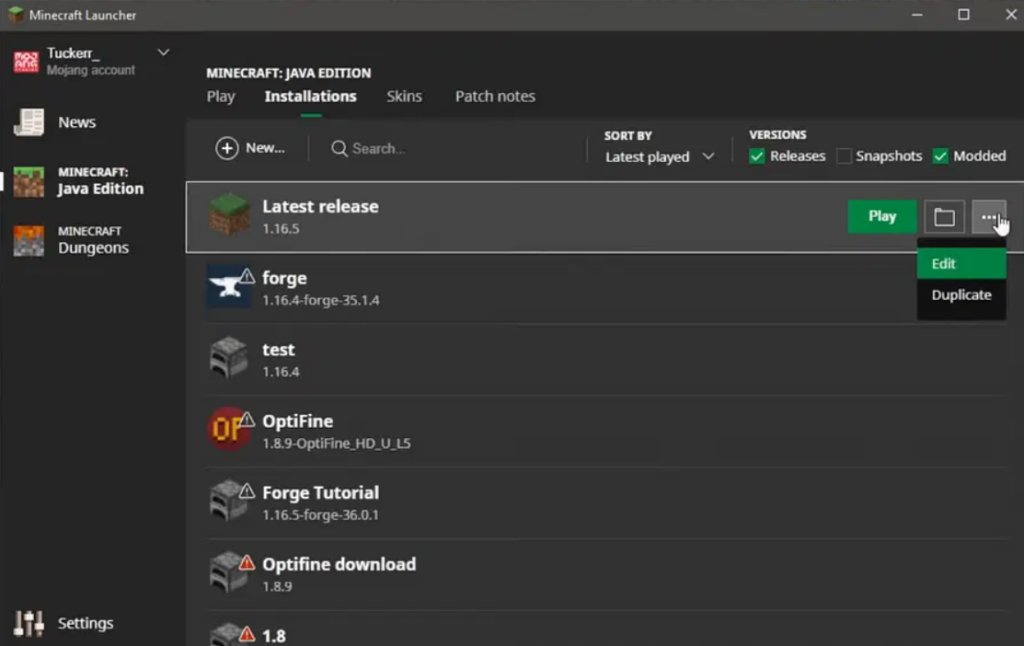
- Thereafter, in the bottom-right corner of the screen, select “More Options.” You will find the code “-Xmx2G” in the JVM Arguments textbox. Simply change the [2G] value to the amount of RAM Minecraft should have.
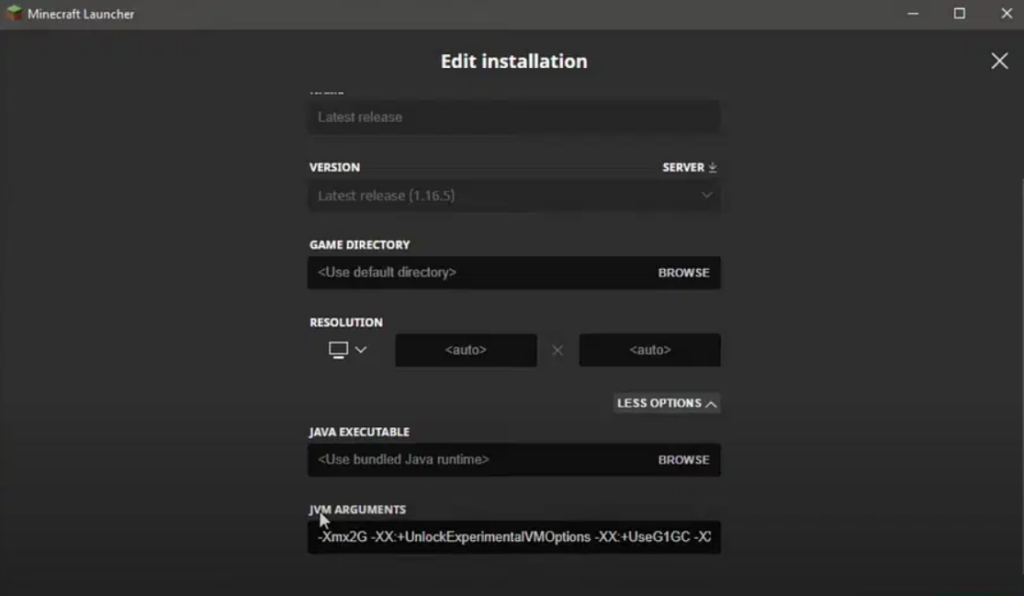
- To finalize the changes, click ‘Save.’
Here’s how you increase the RAM on a Minecraft server you host.
- Go to the folder that contains all the files for your Minecraft server.
- The first step is to create a new text document.
- Paste the following code into the document:
java -Xmx####M -Xms####M -exe Minecraft_Server.exe -o truePAUSEPut how much RAM you want to allocate in place of “####.” If you want to allocate 4 GB, for instance, you would enter 4096, making the code:
java -Xmx4096M -Xms4096M -exe Minecraft_Server.exe -o truePAUSE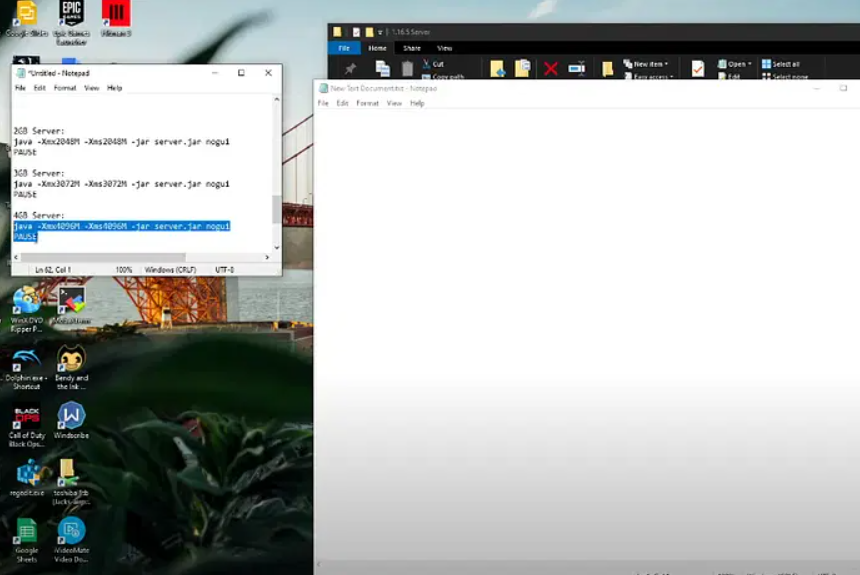
- To save, click “File,” then “Save As…“, then select “All Files.” from the menu that appears.
- If you have saved the document and seen it in your folder, rename it “file server launcher.bat” or “run.bat” without the quotes.
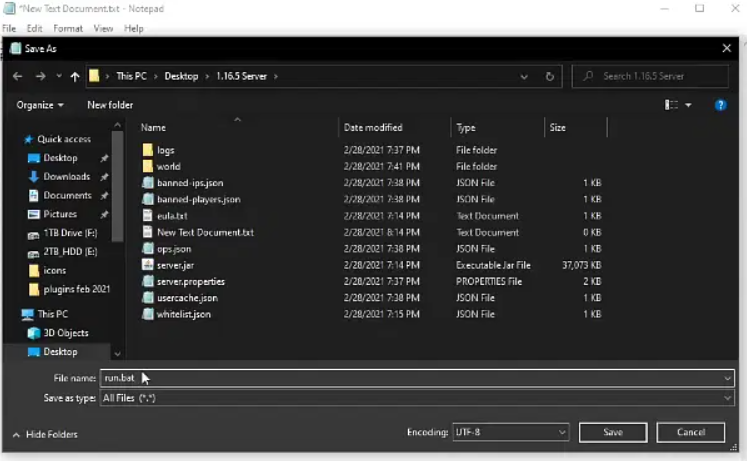
- It began as a text document and is now your Minecraft server’s launcher. To start your server with the new amount of RAM, double-click the new .bat file.
Sum Up
So, that’s how you can allocate more RAM on Minecraft. We hope that this guide has helped you. For more info, comment below and let us know.
Further Reading:
Directly in Your Inbox

