
As a Windows user, losing your most critical or important data due to accidentally permanently deletion can be extremely overwhelming and stressful. Thus, you will agree that there is always a high probability of data loss that is caused by human error or even unexpected occurrences.
Moreover, accidentally pressing the ‘delete’ key on your PC could happen without you noticing somehow which leads to a permanent loss of data.
Don’t want to miss the best from TechLatest?
Set us as a preferred source in Google Search
and make sure you never miss our latest.
Fortunately, we reveal to you in this article various ways how to recover permanently deleted photos or data easily. Ensure you follow closely to get your deleted photos back now!
Part 1: Common Cause of Permanently Files Loss
The situation of permanent file loss is caused due to some factors. The most common causes are pinpointed below:
- Emptying Recycle Bin:
A recycle bin being emptied is one of the most common causes of losing a file permanently. This can occur when a Windows user either accidentally or intentionally deletes a file on the PC.
- Deleting of Files Using A Command:
This is also another common cause of permanent file loss which happens when a user deletes a particular file by using the command “Shift + Delete”.
Part 2: How to Recover Permanently Deleted Photos with Tenorshare 4DDiG
Tenorshare 4DDiG is an all-in-one solution data recovery software or tool built to perform all related data recovery and even repair for all situations you might ever think of.
Thereby, recovering deleted photos and lost files caused by accidental or intentional deletion is made easier with the use of Tenorshare 4DDiG.
Below is a step-by-step guide to walk you through how to recover deleted photos or files with the help of Tenorshare 4DDiG effortlessly:
Step 1:
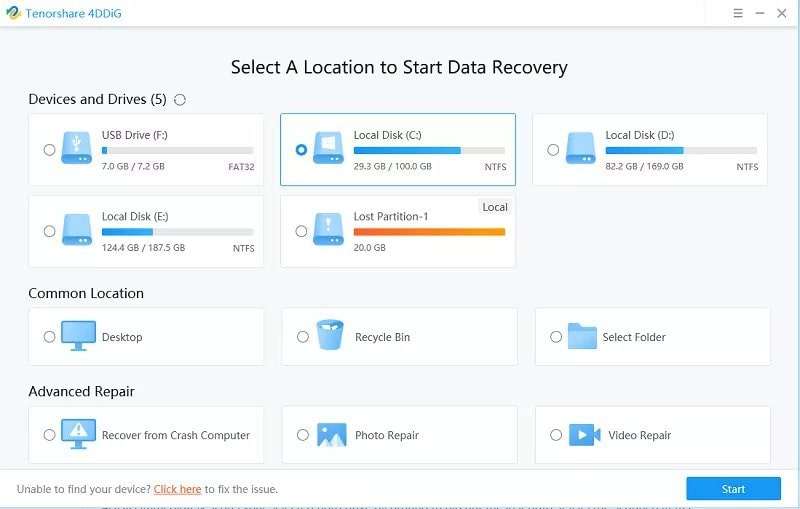
Firstly, Launch 4DDiG on your PC. After that, the home interface of the data recovery software will be shown to you as displayed below. This comprises numerous sections like Devices and Drives, Common Location, and Advanced Repair.
You will also see available hard drives that are present on your PC, so choose the specific local disk where the deleted photos or files occurred and click on the “Start” button.
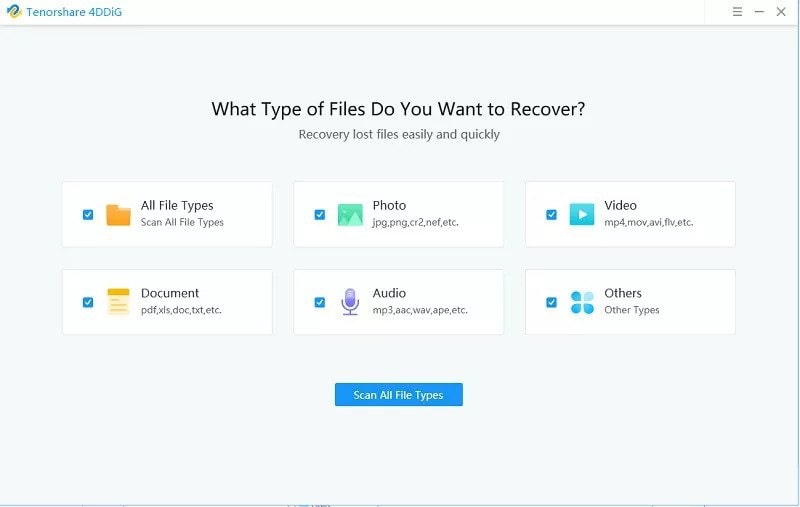
Then choose the photo you want to scan and click Scan Selected File Types or select Scan All File Types depending on the file types you wish to scan.
Step 2:
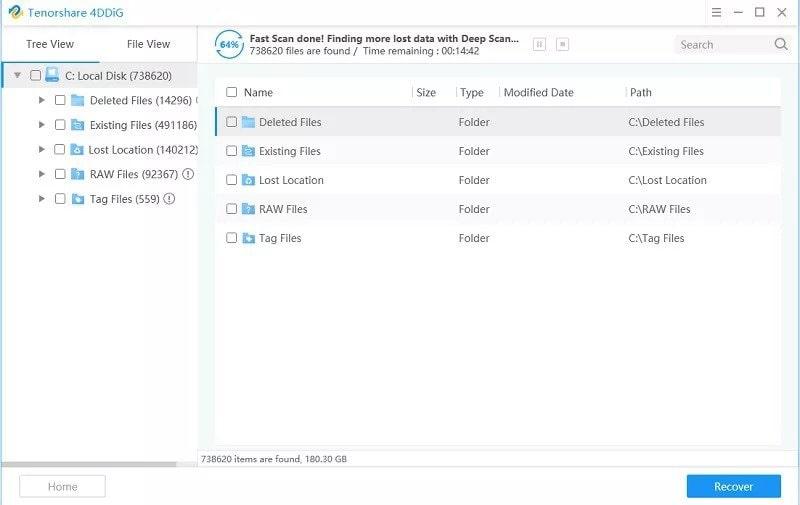
Secondly, there is an immediate examination by Tenorshare 4DDiG of the drive being selected for the lost photo or files, then you are allowed to stop the searching once the recently deleted photos have been identified for recovery.
Step 3:
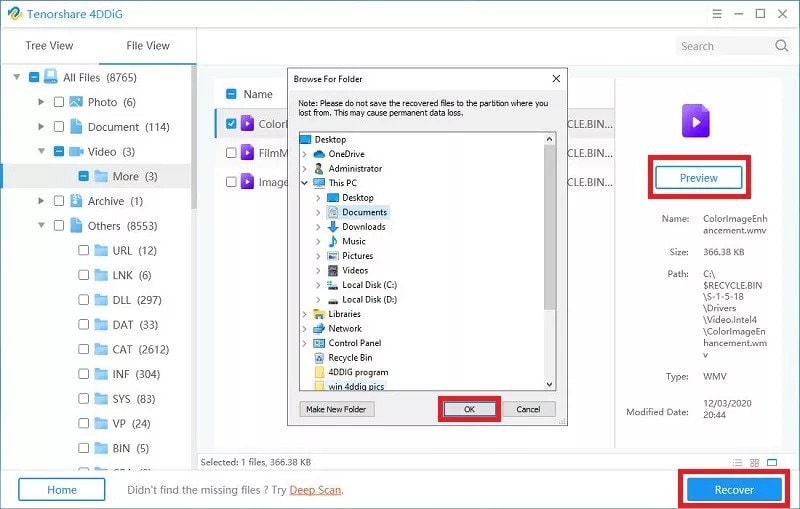
After identifying the specific photos or files, then proceed to previewing and recovering to a safe location. However, to prevent disk overwriting and permanent loss of photo, ensure you do not save to the initial partition where the loss occurred.
Part 3: Fixes for Recover Permanently Deleted Photo/Picture without Software
Recovering permanently deleted photos/pictures can be done without software as well. The various fixing methods available for dealing with the photo or file loss issue are explained below:
Fix 1: Recover Permanently Deleted Files from Recycle Bin
Knowing that when a file is being deleted on Windows by hitting the “delete” key, the file is being moved to the Recycle Bin immediately, where it stays until it is emptied manually.
Follow the step-by-step guide below to know how to recover permanently deleted photos or files from Recycle Bin.
Step 1:
Firstly, double-click on the Recycle Bin icon to open it.
Step 2:
Then have a look at the deleted files, right-click on the specific file you want back and select “Restore” to recover it to its initial location.
Fix 2: Retrieve Deleted Files with Command Prompt
The Command Prompt is the least user-friendly fixing method for retrieving deleted files. Follow the step-by-step guide below to know how to retrieve deleted photos or files with Command Prompt.
Step 1:
Launch the Start menu, then type “cmd”, right-click on the top match part, and choose “Run as administrator” to set the Command Prompt on run with the honor of the administrator.
Step 2:
Input “chkdsk X: /f”, then hit the Enter button and displace “X” with your hard drive letter.
Step 3:
Also, input “ATTRIB -H -R -S /S /D X:*.*”, then hit the Enter button on your keyboard. Also, replace “X” with your hard drive letter.

Note that the process of the recovery may need some time to complete. Thus, keep calm and don’t perform any action on your computer until the recovery is completely done.
Fix 3: Restore Permanently Deleted Files from Windows Backup and Restore Feature
Windows Backup and Restore Feature is a data restoring component to enable users to backup and restore permanently deleted files. To make use of the Backup and Restore tool, follow the steps below:
Step 1:
Launch the Start menu, then input the word “backup” and hit the Enter button.
Step 2:
After that, choose “Go to Backup and Restore”.
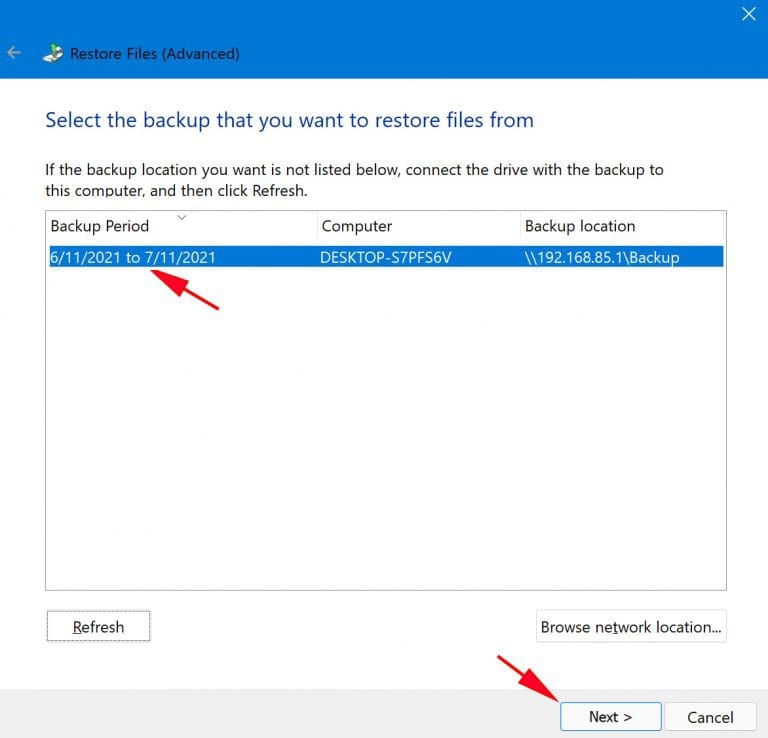
Step 3:
Finally, choose the option of “select another backup to restore files from”, select your backup and choose “Next” to abide by the instructions in completing the process of the recovery.
Fix 4: Recover Deleted Photo from File History Backup
The File History Backup is being used in place of the Backup and Restore Feature which allows for recovering deleted photos. Follow the step-by-step guide below on how to recover deleted photos from File History Backup:
Step 1:
Launch the Start menu, input “restore files”, then hit the Enter button.
Step 2:
Locate the folder where the lost files were kept, and choose the “Restore” symbol at the bottom middle of the interface.
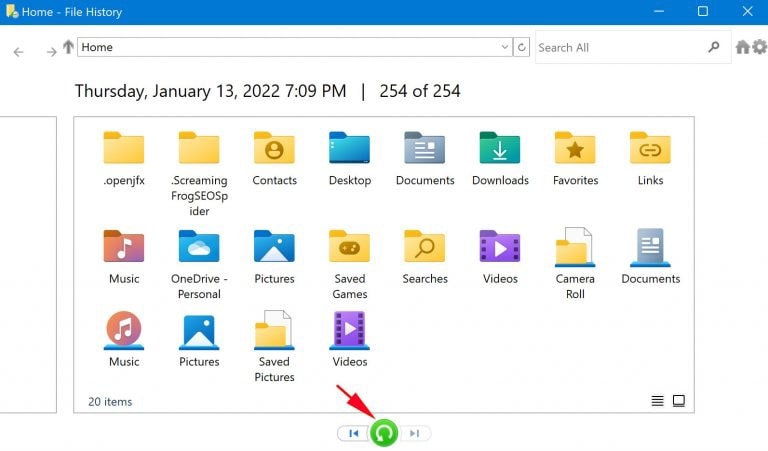
If no folder is seen, then it is because the File History is turned off. So, you will see the option to put it on.
Fix 5: Recover Deleted Picture with Previous Version Feature
The Previous Version Feature enables you to recover deleted pictures on your computer which is possible once it has been activated. The step-by-step instruction below explains how to recover deleted photos swiftly:
Step 1:
Launch the Start menu and input “system protection”, then hit the Enter button.
Step 2:
After that, select a hard drive at the “Protection Settings”, and pick “Configure”.
Step 3:
Choose “Turn on system protection”, then click on ‘OK’.
Step 4:
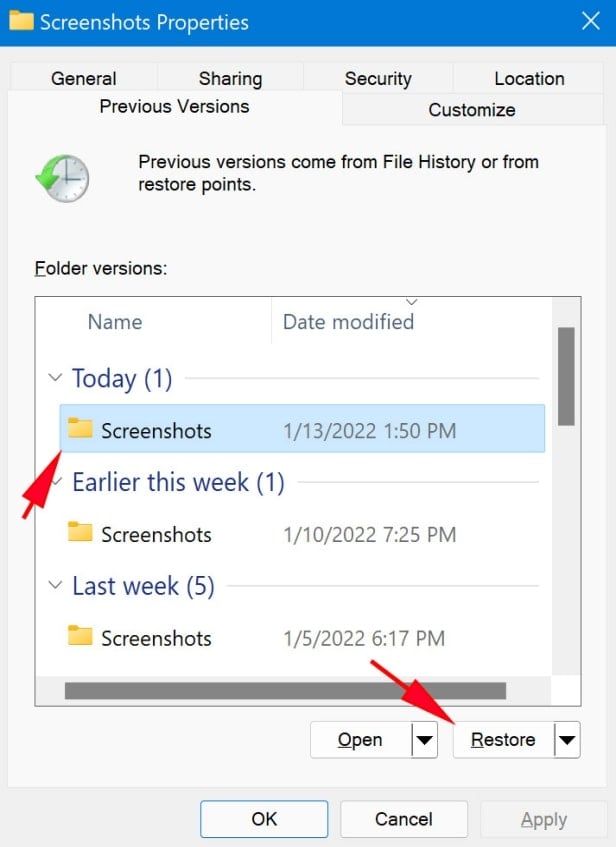
Finally, the Previous Version Feature can then be used to recover deleted pictures by right-clicking on the specific picture, navigating to the ‘Previous Versions’ tab, then choosing the version you prefer to recover.
Fix 6: Retrieve Deleted Photos from Google Drive
To know how to retrieve deleted photos from Google Drive, you just need to directly execute the recovery process on the particular drive where you kept the Google drive folder to retrieve files that can’t be retrieved by making use of the option ‘Restore from Trash’ located in Google drive.
Conclusion
Having revealed to you the various fixing methods on how to recover permanently deleted photos, then ensure you execute any of them in getting back your lost photo, files, or data.
Moreover, it is advisable you make use of the most recommended data recovery software called Tenorshare 4DDiG in recovering permanently deleted photos on your computer or PC in a jiffy.
Enjoyed this article?
If TechLatest has helped you, consider supporting us with a one-time tip on Ko-fi. Every contribution keeps our work free and independent.
Support on Ko-fiDirectly in Your Inbox


