Highlights
- The “This Device Cannot Start. The “Network Adapter Code 10” error is a common issue that can arise due to hardware or software-related issues.
- There are thousands of Windows users who are getting this problem after the recent Windows update, and they are looking for some fixes.
- Luckily, we have some fixes that will surely help you resolve this problem.
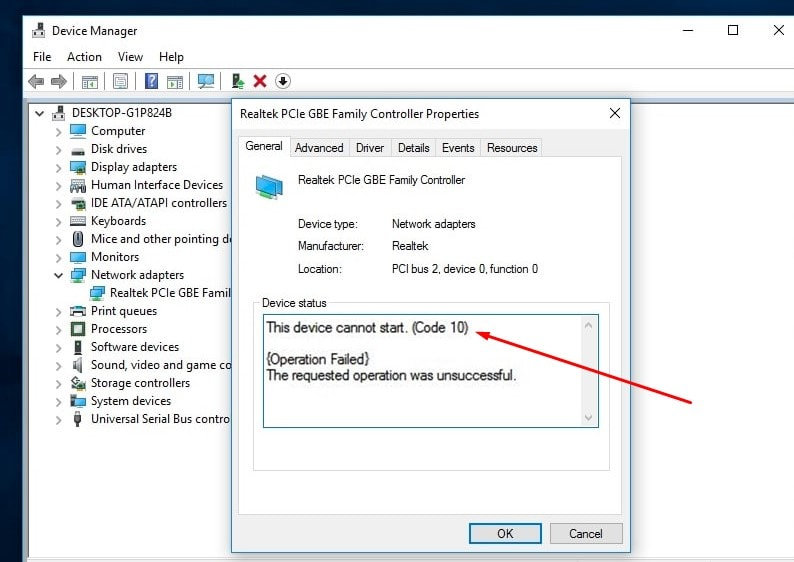
“This Device Cannot Start. (Code 10).” This Windows error occurs when the network adapter does not function properly: “This device cannot start.
This error can also cause problems with opening internet pages. Therefore, it is important to solve the problem as soon as possible.
Don’t want to miss the best from TechLatest?
Set us as a preferred source in Google Search
and make sure you never miss our latest.
In this guide, you will learn about the different reasons behind the error, with successful working solutions to solve it.
Understanding the “This Device Cannot Start. Code 10” Error
The “Code 10” error usually means that there is a hardware or driver-related problem preventing the network adapter from working. Common causes include:
- Corrupt or outdated network drivers
- Conflicts with system updates or software changes
- Hardware malfunctions
- Registry issues
- Power management settings interfering with the adapter
Methods to Fix Network Adapter: “This Device Cannot Start. (Code 10)”
Here are some best methods that will help you resolve the network adapter error on your Windows 10/11 PC. So, if you want to know, let’s dive into it.
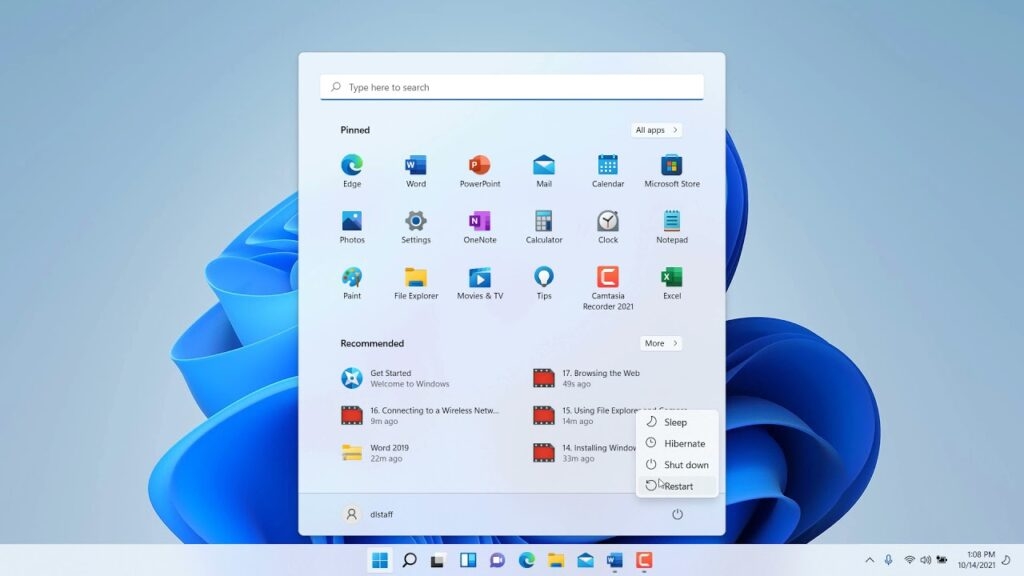
Method 1: Restart Your Computer
As a precaution, restart your computer before you do anything to resolve the Network Adapter: “This Device Cannot Start. (code 10).” Sometimes, rebooting the computer can free up system resources and avoid temporary clashes.
Method 2: Disable and Re-Enable the Device
Temporarily disabling and re-enabling a device forces the system to reset its connection, which can sometimes resolve software conflicts or glitches.
This procedure forces Windows to reload the driver, which helps remedy minor incompatibilities.
- Right-click the Start Menu and open Device Manager.
- Locate the affected device, in our case Network Driver, right-click it, and choose Disable device.
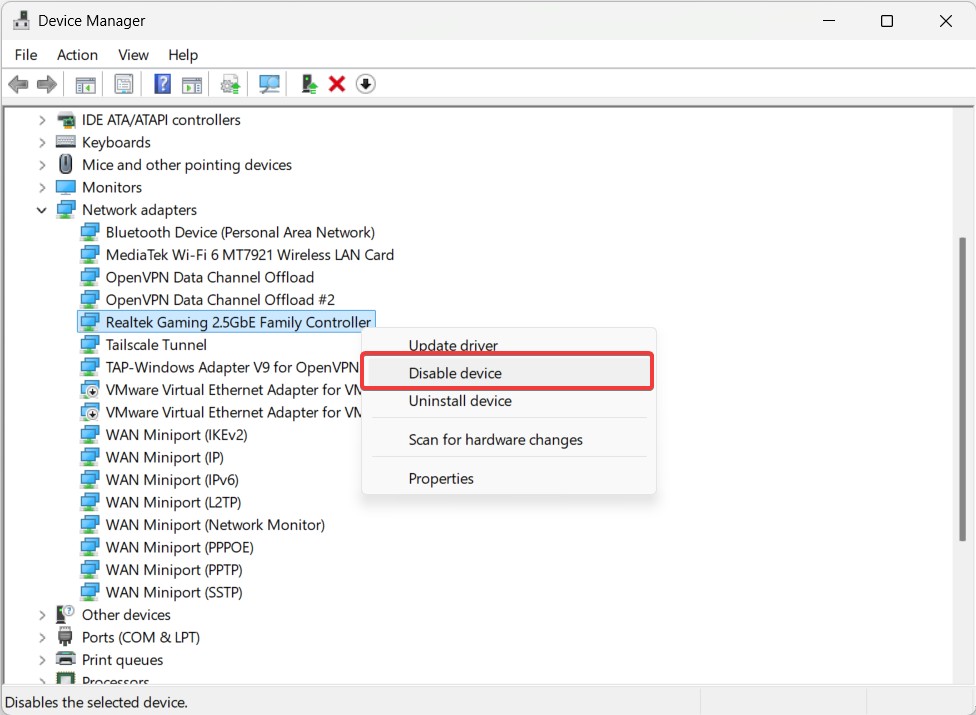
- Afterward, wait a moment, then right-click it again and select Enable device.
- Check if the issue is resolved.
Method 3: Power Cycle Your Computer
Power cycling, or a complete shutdown and restart, can resolve temporary system glitches and refresh connections to the devices.
This method works particularly well for network adapters or other hardware that hangs.
- Shut down your computer completely.
- Now, disconnect the power source (and remove the battery if using a laptop).
- Wait for a minute, then reconnect the power and turn the system back on.
Method 4: Use Windows Troubleshooter
After power cycling, we’ll take you through the built-in troubleshooting tools in Windows, which are able to diagnose and resolve common hardware-related issues.
- Click the Start Menu and search for Troubleshoot settings.
- You can click Other Troubleshooters to see all available tools.
- Choose the Network and Internet troubleshooter and then click Run the troubleshooter.
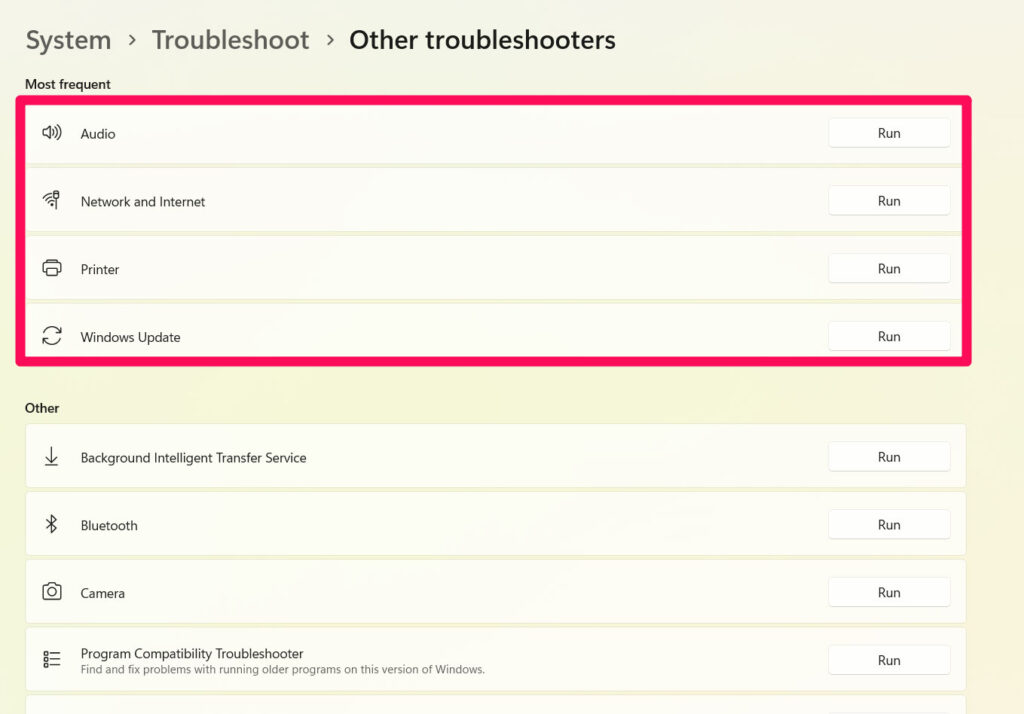
- Follow the onscreen directions to work out what the problem is and how to fix it.
Method 5: Reinstall the Device Driver
Devices can malfunction due to driver corruption or compatibility problems. A reinstall of the driver can often fix the functionality.
- Right-click the Start Menu and open Device Manager.
- Locate the problem device, right-click on it, and select Uninstall device.
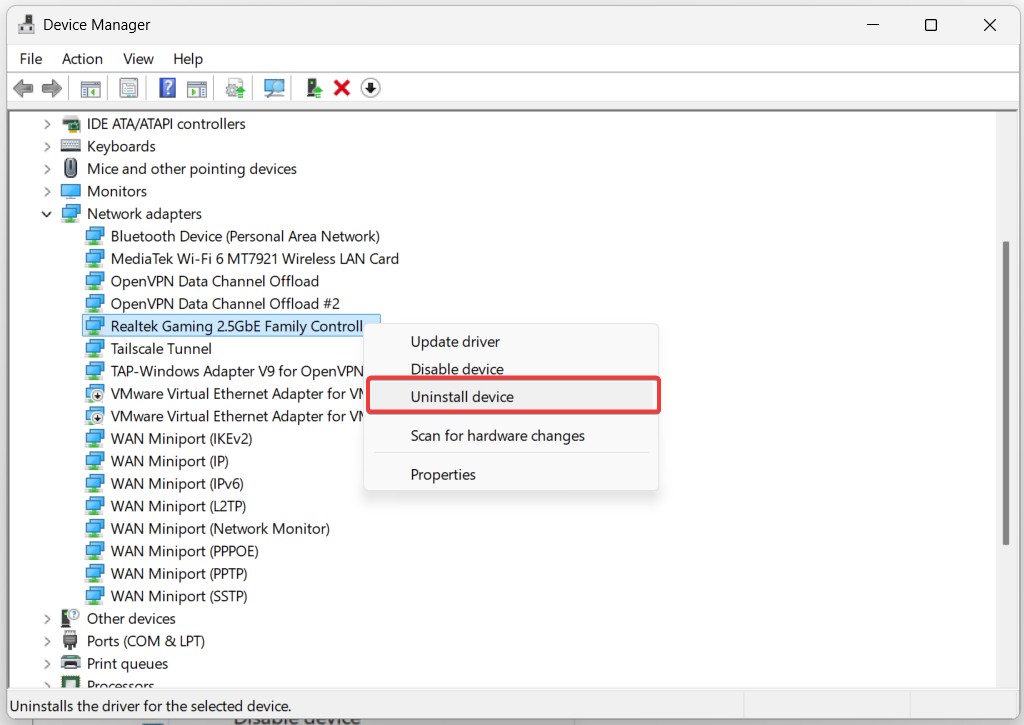
- Click Uninstall to confirm, then restart your PC.
- Rebooting will cause Windows to automatically reinstall the driver.
Now, just check if the Network Adapter: “This Device Cannot Start. (code 10)” error gets resolved or not. If not, then check out the fixes mentioned further.
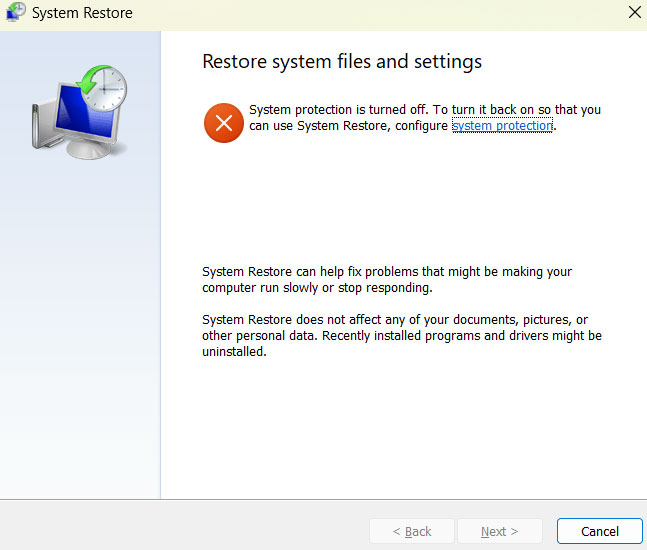
Method 6: Use System Restore
Restoring Windows to an earlier point in time can undo system changes that may have caused the Network Adapter: “This Device Cannot Start. (code 10)” error if the problem started after a recent update or installation.
- Hit Win + R, type rstrui and hit Enter.
- Afterward, click Next and choose a restore point from before the issue starts.
- Finally, just follow the prompts and click Finish to initiate the restoration process.
Method 7: Roll Back Drivers
If the recent driver update is causing problems, restoring the previous one should do the trick.
- Initially, go to Device Manager and find the device that is causing the problem.
- Right-click it and choose Properties.
- Thereafter, open the Driver tab and click Roll Back Driver (if present).
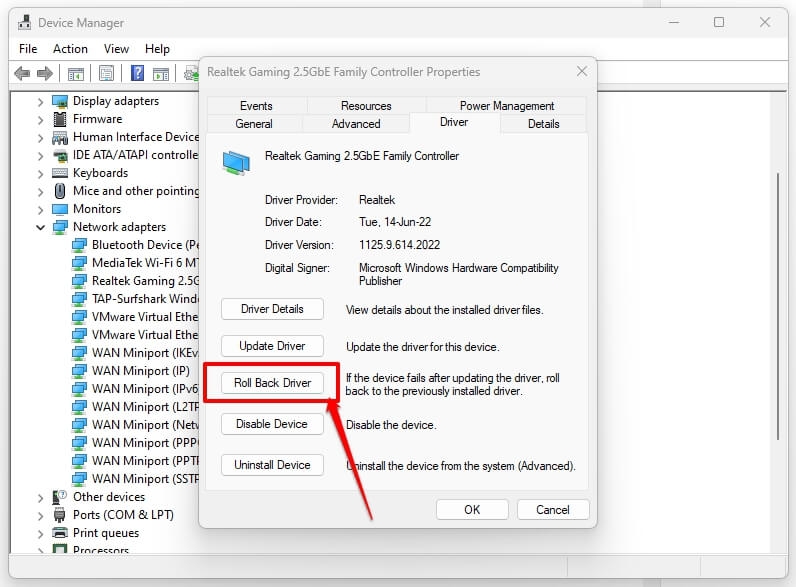
- You will complete the rollback following the instructions.
Method 8: Change Your DNS Server
You can fix this by using a different DNS server, such as Google DNS or OpenDNS.
- Press Win + R, type ncpa. cpl, and press Enter.
- In the list of connections, right-click your active network connection and click Properties.
- Click on Internet Protocol Version 4 (TCP/IPv4) and click on Properties.
- Select Use the following DNS server addresses: and type in:
- Preferred DNS server: 8.8.8.8
- Alternate DNS server: 8.8.4.4
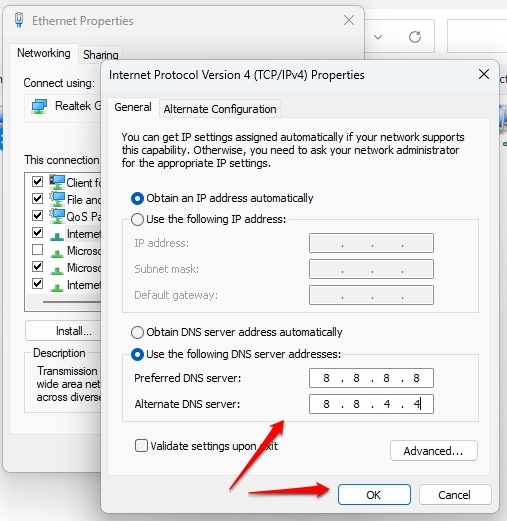
- Click the OK button and restart your computer.
Method 9: Check for Hardware Issues
If the above suggestion doesn’t work, the network adapter itself could be faulty. Try the following:
- Test with another network adapter: Try using an external USB Wi-Fi adapter and see if the problem persists.
- Check the motherboard: When using a built-in network adapter, ensure the motherboard works fine.
- Consult a technician: If an adapter is broken, try to replace it or get help from technical assistance.
Conclusion
The Network Adapter: “This Device Cannot Start. (code 10)” error can be annoying because it has a few different causes, but thankfully, it’s also usually quite easy to fix.
Updating drivers, changing some settings, and doing a network reset will fix the issue and get your network adapter working again. If the problem continues, hardware replacement could be needed.
So, that’s all we have for you about how to fix Network adapter: “This Device Cannot Start. (code 10)” error. We hope that this guide has helped you. For more info, comment below.
Enjoyed this article?
If TechLatest has helped you, consider supporting us with a one-time tip on Ko-fi. Every contribution keeps our work free and independent.
Support on Ko-fiDirectly in Your Inbox


