Microsoft has introduced a touch screen feature with Windows 10. It allows users to manage Windows operating system with fingers. You can literally use it as a tablet.
The touch screen feature is only useful for graphic designers and video editors. Users can manage their timeline using a touch screen but if you are a normal user then it doesn’t change anything.
If you have a Windows laptop with a touch-enabled display and you don’t want to use it, or cause issues for your work, you can easily disable it.
It doesn’t matter which Windows version you are using, you can always disable the touchscreen in Windows 11 or 10. You can also follow the same process for Dell, HP, Lenovo, and Asus laptops.
How to Disable the Touchscreen in Windows 11
Disabling the touch screen on Windows 11 is simple. The touchscreen is controlled by Human Interface Devices or HID. If your touch screen is HID-compliant, you can choose to disable it.
Once you do, your device will stop working. You will be asked to confirm this action, and your PC will reboot.
Method 1: Using Device Manager
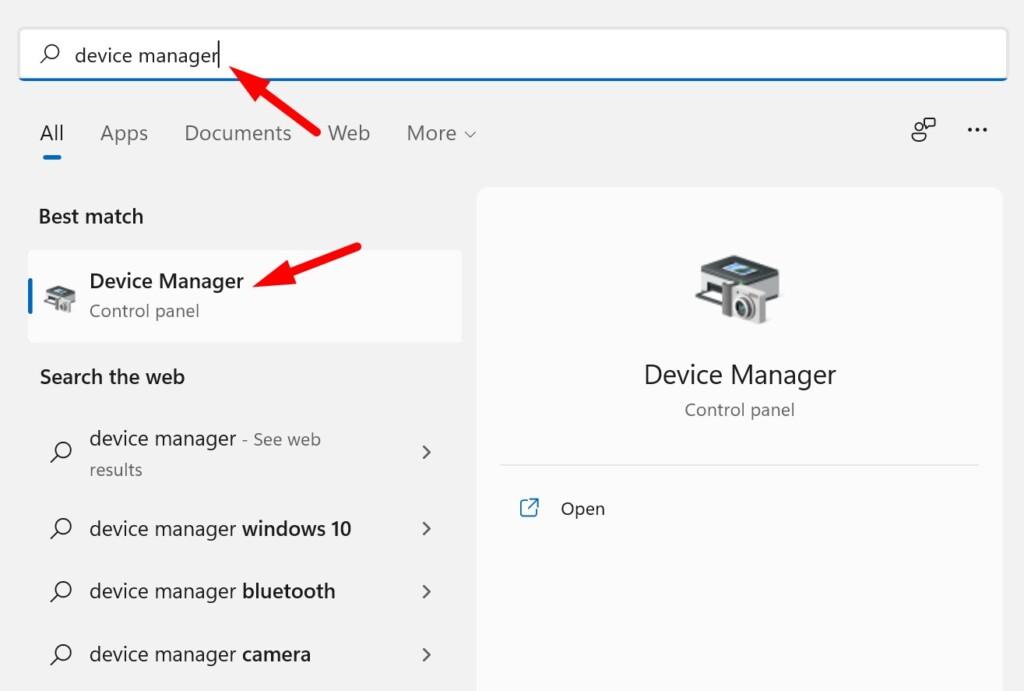
Device Manager allows users to manage all connected devices on your Windows 11. You can use it to disable the touch screen. Here are the steps:
- Open the start menu using the Windows button and then search for Device Manager. Click on device manager to open.

- In the device manager, find and double click on it to expand the Human Interface Devices.
- Find the HID-compliant touch screen option and right-click on it.

- Choose Disable and confirm the action. This will disable the touch screen on your Windows 11.

- If you wish to enable it again, simply repeat the previous steps and choose Enable.

Method 2: Use Registry Editor
Device manager only disables touchscreen temporarily but if you want to disable it permanently then you have to change registry files. Here are the steps to edit the registry.
- Open the start menu with the Windows key on your keyboard and then search for Regedit.
- Click on registry editor from the list.
- Go this path:
HKEY_CURRENT_USER\Software\Microsoft\Wisp\Touch
You can copy and paste this path directly in the address bar and press enter.

- Right-click on the empty area in the right sidebar > choose New > DWORD (32-bit) Value.
- Name it TouchGate.
- Double click on TouchGate and change the value to 0.

- Close the Registry Editor and restart your computer.
This will disable the touch screen on your Windows 11 permanently.
Method 3: Use Registry Script
If you don’t need to follow this complex registry hack then you can directly download and run this registry key.
- Download this registry script and save it on your computer.
- Right-click on the disable_enable_touch_screen.reg file and choose the Merge option from the context menu.
- Finally, click on the Yes option to confirm the action and then restart your PC.
This will edit the registry for touchscreen and disable it.
Method 3: Disable the Touchscreen Using Windows Terminal
If you are tech-savvy and you know how to use command prompts then you can use it to disable the touch screen in Windows 11. For this, follow these steps:
- Open start menu using Windows keyboard on your keyboard.
- Search for PowerShell. Choose run as administrator in the right sidebar.
- Copy & paste this command and press enter.
Get-PnpDevice | Where-Object {$_.FriendlyName -like 'touch screen'} | Disable-PnpDevice -Confirm:$false

If you want to re-enable the touch screen again, here is a command.
Get-PnpDevice | Where-Object {$_.FriendlyName -like 'touch screen'} | Enable-PnpDevice -Confirm:$false
We have shared all methods to disable the touch screen on your Windows 11. If you need any help then comment below or contact us.
Directly in Your Inbox


