When you give a brew command on your Mac and encounter a “command not found: brew” error, then it can be due to two reasons: one being the wrong path file selection or directory not listed in the path environment, and the other reason can be ‘Brew’ is not installed on your Mac.
In this article, we have provided the working solutions for the brew command error. Have a look at them below.
Why Do I Get ‘brew: command not found?”
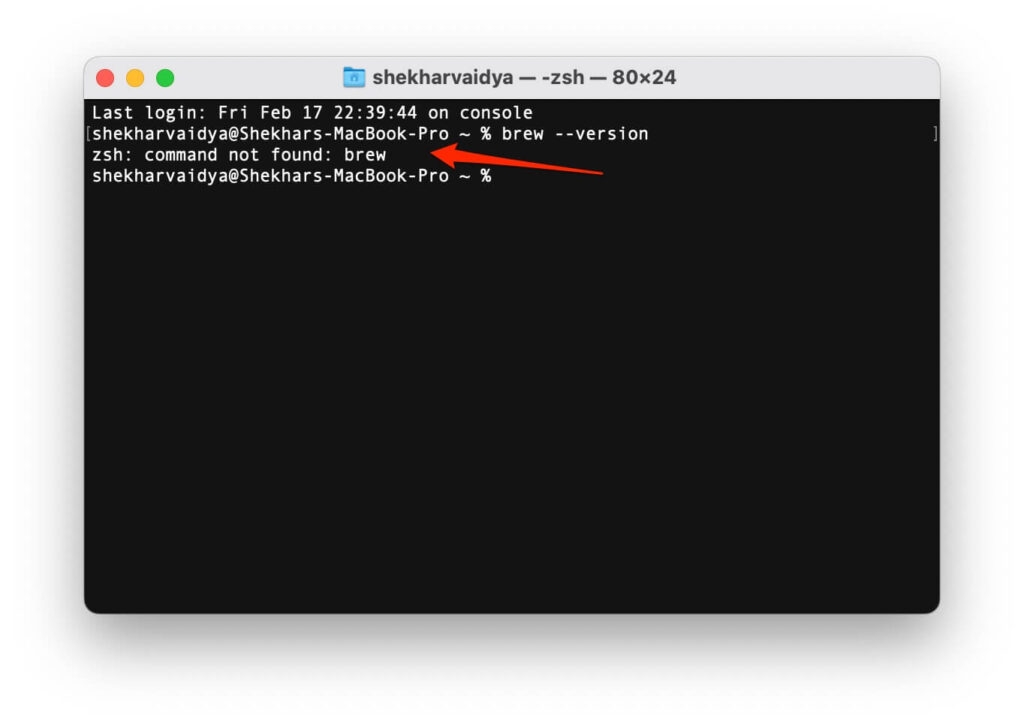
As mentioned above, one of the common reasons for getting the ‘command not found brew’ on Mac is due to the executable brew directory not being present in the ‘PATH’ environment.
What is the ‘PATH’ Environment Variable?
These are the system variables that can be accessed by both the processes and the users operating the OS. Environment variables store the values system-wide, and ‘PATH’ is one such variable.
‘PATH’ has the address of directories that are searched for the executable files of a program.
How to Fix ‘Command Not Found brew Mac’ Error?
Method 1: Reinstall Homebrew
When the Homebrew software does not perform as expected, the best way is to uninstall the software and reinstall it.
If you want to uninstall the ‘Homebrew’ software completely, without leaving any cache, then you need to open the terminal on your Mac and then enter the following command:
/bin/bash -c "$(curl -fsSL https://raw.githubusercontent.com/Homebrew/install/HEAD/uninstall.sh)"
This is a command given by the official developers of Homebrew on GitHub.
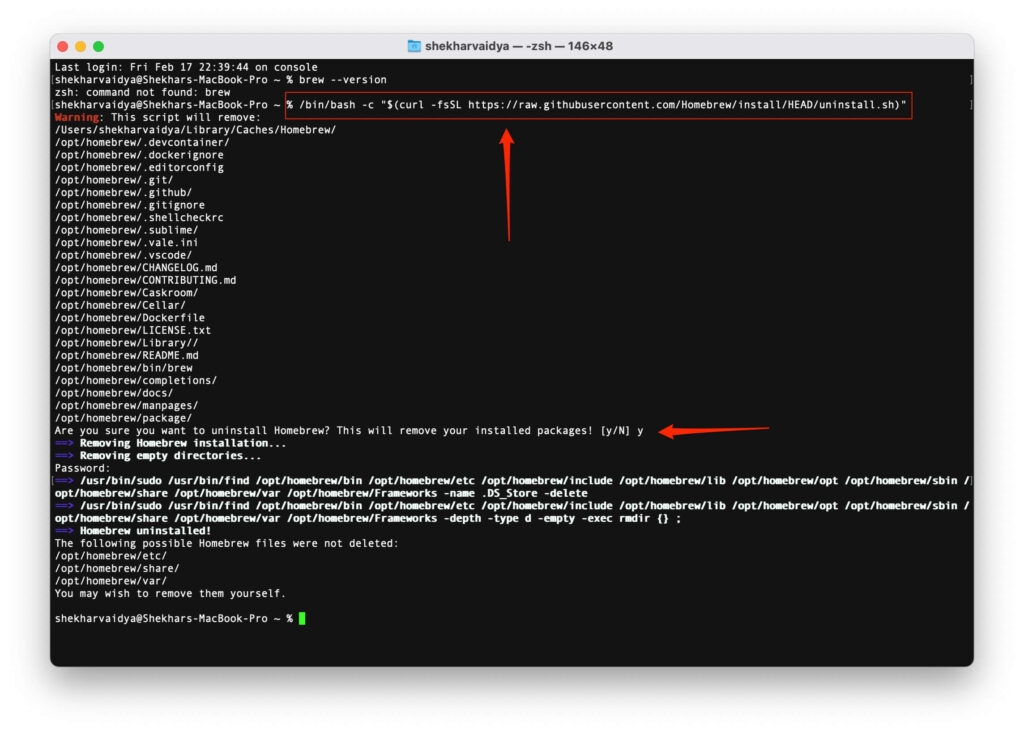
- After you uninstall the Homebrew software completely, restart the system.
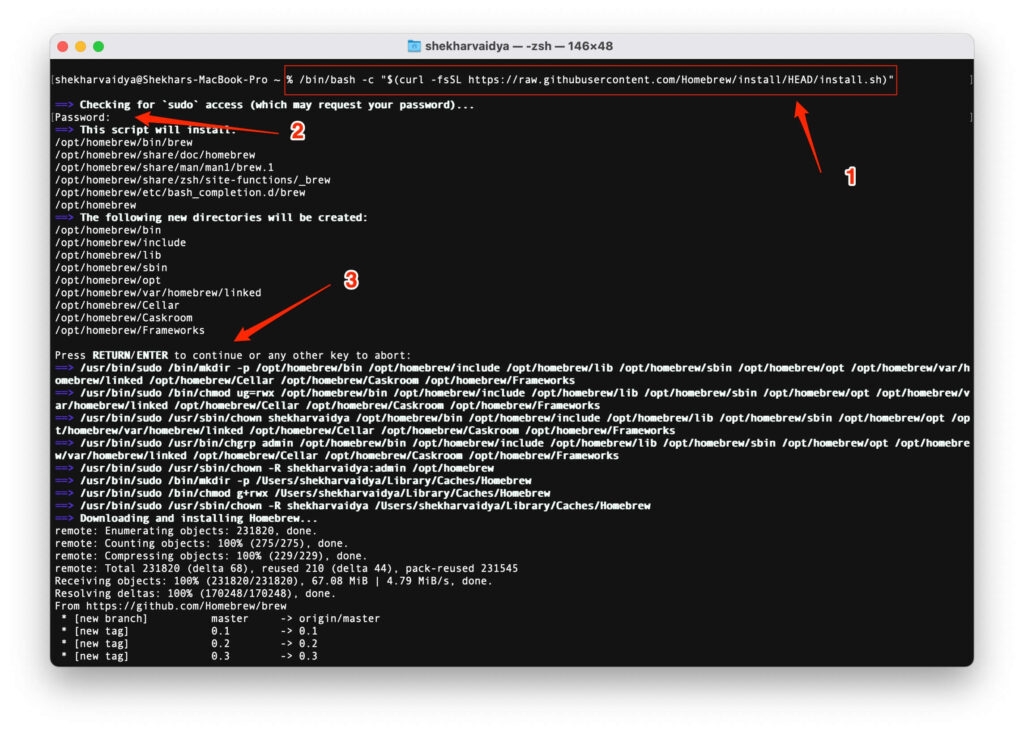
- Now, copy and then paste the following code into the macOS terminal for installation (go to the Homebrew website to cross-check the installation command):
/bin/bash -c "$(curl -fsSL https://raw.githubusercontent.com/Homebrew/install/HEAD/install.sh)"
Since the Homebrew is completely rewritten on the ‘Bash’ platform, the command line is changed to /bin/bash instead of ruby.
Now, run the following command to set the PATH:
echo 'PATH="/usr/local/bin:$PATH"' >> ~/.bash_profileInstall ARM Version on M1 Device
If you are using a Mac powered by an M1 chip, your device shows an instruction to add brew to the zsh configuration file with the name .zprofile.
Instead of the path /usr/local/homebrew, you need to install Homebrew in /opt/Homebrew.
Use the following code on your M1 Device to install the ARM version of Homebrew:
/bin/bash -c "$(curl -fsSL https://raw.githubusercontent.com/Homebrew/install/HEAD/install.sh)"Now, run these two commands in your terminal to add Homebrew to your PATH:
echo 'eval $(/opt/homebrew/bin/brew shellenv)' >> /Users/$yourdevicename/.zprofile
eval $(/opt/homebrew/bin/brew shellenv)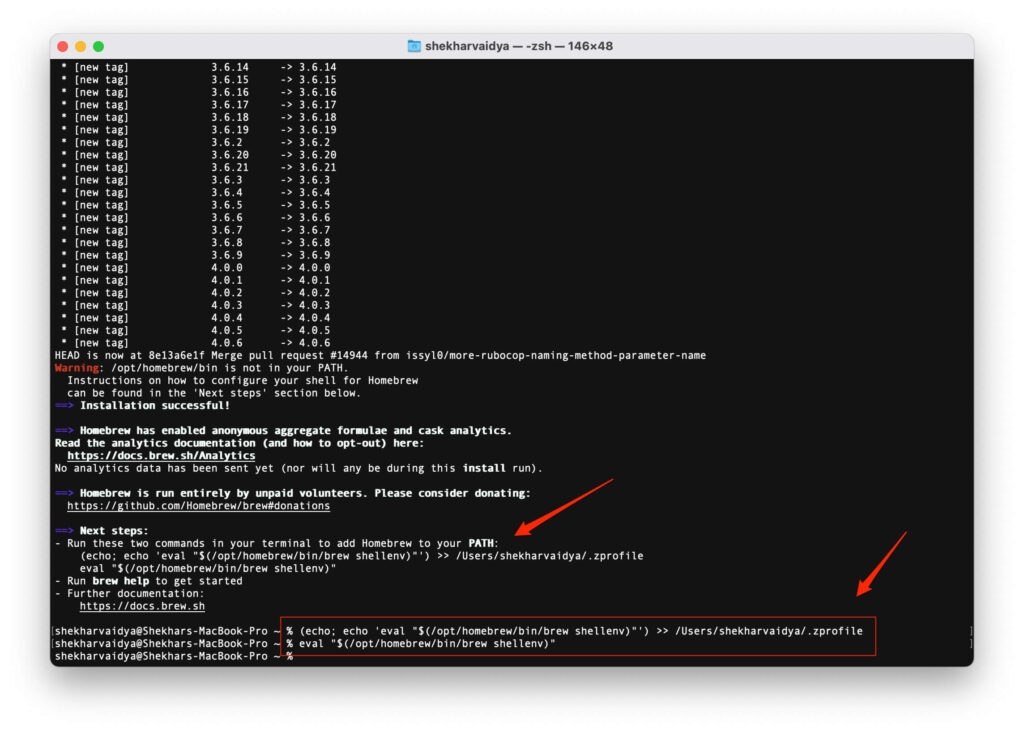
You can also add the brew to .zshrc by following the command given below:
echo 'export PATH="/opt/homebrew/bin:$PATH"' >> $HOME/.zshrc
Method 2: Install XCode on your Mac
Most Mac users have complained that the Homebrew software was not running if the Xcode was not installed on the system. So, you need to have an Xcode on your system; follow the process for the same below:
- First, run the following command to know whether or not the XCode is already installed on your system.
/usr/bin/xcodebuild -version
- In case if the XCode is already installed on your Mac, you will find the exact version like this:
Xcode 12.3 Build version 12C33
- In case, you don’t have Xcode already installed, use the following command to do so:
xcode-select --install- Now, open the Xcode and navigate to Preferences → Location. You can find this option under the ‘Command Line Tools.’

- Now, run the following command after opening the terminal:
/bin/bash -c "$(curl -fsSL https://raw.githubusercontent.com/Homebrew/install/HEAD/install.sh)"
For Mac M1 users, it is recommended to use the following command:
echo "export PATH=/opt/homebrew/bin:$PATH" >> ~/.zshrc
Conclusion
We hope this article has helped you fix the ‘command not found brew’ error on your Mac. If none of the above mentioned methods work, then we recommend you raise a complaint on Github on the Homebrew repository.
Further Reading:
Directly in Your Inbox


