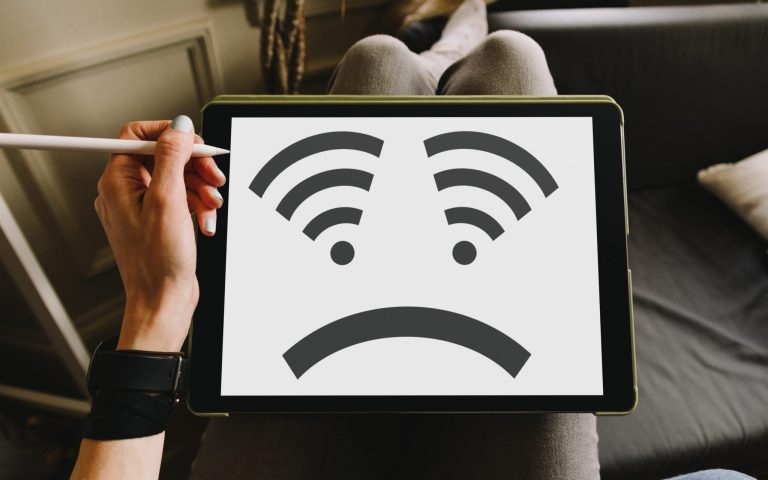
If you are accessing the internet, only to find that “Why Is My Wifi Not Working”? Then you’re in the right place. This can be very frustrating, especially when you need to get online for work or school and your wifi doesn’t work.
There could be many reasons why your home wifi isn’t working. It could be that your internet service provider is experiencing an outage, or there could be an issue with your router or modem.

This blog post will discuss some of the most common causes of wifi issues. We’ll also give you some tips on how to fix it.
If you are having WiFi issues, keep reading!
Basic Solutions to fix Your Wifi:
Check Your Wifi Connection
You must first check your WiFi connection whenever your WiFi stops working on many devices. There is a possibility that your WiFi is malfunctioning. Follow these steps to troubleshoot until you find the solution.
Reboot Your Router and Modem
If you still can’t connect to your WiFi after checking your connection, you should reboot your router and modem.
Note: You will temporarily disconnect anyone connected to the network.
- First, Unplug the power source from the device modem and the Wireless Router.
- and wait for a few minutes.
- Then you must plug in the power source to your modem and router again.
- After that, reconnect your device to the WiFi network.
Make Sure The Wifi Signal Is Not Blocked
Physical objects can block your WiFi signal. You’ll have a weaker WiFi signal if there are walls or doors between your router and where you’re using it.
Also, check to see if any electronic devices could interfere with the WiFi signal. Move them away from the router if this is the case. Make sure your router is in the center and as close to you as possible to get a better WiFi signal.
Check if any objects around your router, such as metal objects, cordless phones, microwave ovens, and Bluetooth speakers, can block the WiFi signal. Move your router to a higher location if possible.
Your WiFi signal can be interfered with if these devices operate at similar 2.4 GHz or 5 GHz frequencies. You may need to turn off these devices and reconnect to your WiFi again after they have been turned off.
Your WiFi may restart after getting a better signal, indicating that the signal is causing the problem. To resolve this issue, you may consider moving your device closer to your router or purchasing a WiFi range extender.
Change The Wifi Frequency And Channel
If your router has both 2.4 GHz and 5 GHz frequencies available, try connecting to the 5 GHz network first. The 5 GHz network is typically faster and has less interference than the 2.4 GHz network. To do this, you will need to log in to your router’s web interface and change the WiFi frequency.
Plug The Computer Directly Into Your Router
You can connect your computer directly to the router with an Ethernet cable. This will help you determine whether the issue is with your computer or WiFi connection.
If the internet works fine when you are connected with the Ethernet cable, then the issue is most likely with your WiFi connection. If the internet does not work when you are connected with the Ethernet cable, then the issue is most likely with your computer.
Update Your WiFi Drivers
If you are facing WiFi issues with your computer, you may need to update your WiFi drivers. You can do this by going to the manufacturer’s website for your computer and downloading the latest drivers.
Reset Your Router to Factory Settings
When you cannot connect to your WiFi network after plugging your computer directly into your router, try connecting directly to your modem.
If you still are unable to connect to the internet, your router or modem is likely at fault. When your WiFi router stops working, you can always restore it to factory settings. Unlike a reboot, a hard reset removes all personal settings, such as network names and WiFi passwords.
Make sure you take note of your router’s default username and password and any changes you made to its settings before doing a factory reset.
Reset your router to factory settings by pressing the reset button on the back with a paper clip or any other small, thin object. Press and hold the button for 30 seconds or until the router’s lights flash several times.
Your WiFi network and password can be changed back to their original settings after you reset your router and modem.
Wifi Not Working On Windows: How To Fix It?
You can try these methods below if your WiFi works on other devices, but not on your Windows computer:
Fix WiFi issues by enabling WiFi service
- To enable wifi service on your Windows PC press the Windows logo key and R simultaneously. Then type in “services. msc” and hit Enter.
- Find “WLAN AutoConfig” in the list, then double-click it to open its properties.
- In the Startup type dropdown list, select Automatic, and click Apply. The service will start immediately once you click Start.
- After that, try restarting your computer and see if the WiFi works.
Check If Your WiFi Driver Is Outdated
If enabling the “WLAN AutoConfig” service does not work, you can try checking if your WiFi driver is outdated. To do this, open Device Manager by pressing the Windows logo key and X simultaneously, then select Device Manager.
In Device Manager, expand the Network adapters to see a list of your computer’s network adapters. Right-click on your WiFi adapter and select Update driver software.
Select Search automatically for updated driver software, then follow the instructions to install any available updates. After that, try restarting your computer and see if the WiFi works.
Disable The Windows Firewall
If your WiFi is still not working, you can try disabling the Windows Firewall. To do this, press the Windows logo key and R simultaneously, then type firewall.cpl and click OK.
Go to System and Security > Windows Firewall in the Control Panel. Then, click the On/Off Windows Firewall link in the left sidebar.
Select Turn off Windows Firewall for private and public networks, then click OK. After that, try restarting your computer and see if the WiFi works.
WiFi Not Working On iPhone: How To Fix It?
If you’re using an iPhone and your WiFi isn’t working, these methods can help you.
Force A Reboot On Your iPhone
If your iPhone’s WiFi is not working, one of the first and easiest things you can do is to force a reboot on your device. To do this, press and hold the Sleep/Wake button on the top of your iPhone for a few seconds until you see the “Slide to Power Off” slider appear.
Drag the slider to the right to power off your iPhone, then wait a few seconds and press and hold the Sleep/Wake button to turn your iPhone back on. After that, try connecting to your WiFi network and see if it works.
Check the WiFi network
If your iPhone is still not connecting to your WiFi network, you can try checking the WiFi network to see if there are any issues.
To do this, open the Settings app and select WiFi. After that, tap the name of your WiFi network. If you see a warning that says “No Internet Connection,” there is an issue with your WiFi network.
You can troubleshoot the issue by tapping the “I” button next to your WiFi network. Check whether your WiFi works after that.
Reset your iPhone’s Network Settings
You can try resetting your iPhone’s Network Settings if the WiFi issue is still not resolved.
WARNING: This will delete all your WiFi networks and passwords, so remember them before proceeding.
To reset your iPhone’s Network Settings, open the Settings app and tap on General. Then scroll down and tap on Reset. Click Reset Network Settings and enter your passcode to confirm. Check if you can connect to your WiFi network after that.
Modify DNS on your iPhone
If you’re still having trouble connecting to your WiFi network, you can try changing your iPhone’s DNS (Domain Name System) server. To do this, tap on WiFi in the Settings app. Then select the name of your WiFi network.
Scroll down and tap on Configure DNS. Tap on Manual, then enter the DNS server address you want to use. Check your WiFi network to see if it works.
Conclusion
No matter what the reason is for your wifi troubles, we hope one of these methods was able to help you get back online. Let us know which method helped you to solve your problem. However, you should contact your ISP or an IT expert if you’re still having trouble.
Thank you for reading.
Directly in Your Inbox


![[Top 10] Best Smart Home Manager Apps Smart Home](https://media.tech-latest.com/wp-content/uploads/2023/01/03125550/Smart-Home-Featured-300x169.jpg)


