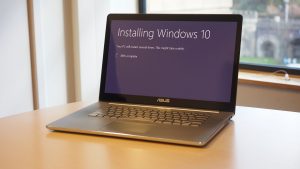
If you have tried to install Windows 10 from a USB drive, chances are, you must have seen “Windows cannot install required files – Error 0x8007025D”. This is a common error that occurs when someone installs Windows from a USB drive. You can easily fix 0x8007025D error in Windows 10 using simple methods.
In this guide, you will see how to fix 0x8007025D error in Windows 10. The error reads “Windows cannot install required files”. So here’s the way to fix it.
How to Fix 0x8007025D Error In Windows 10
So here are some of the methods that you can try to fix 0x8007025D error in Windows 10.
Using a DVD Drive
If you are installing Windows from a USB drive and see this error, just download Windows ISO file and burn it into a DVD drive and install Windows from the DVD drive.
If your device does not support DVD drive, just re-download the Windows ISO file and put it into a new USB drive and create a new USB installation media.
Using a USB 2.0 Port
Connect the USB installation media to a better USB 2.0 port from the port that you are previously using. And if you do not have a USB 2.0 port, install Windows from a USB 2.0 flash drive, or you can disable USB 3.0 support in the BIOS settings.
Check and Change the Hard Disk
This is also one of the possible reasons for the 0x8007025D error, a damaged hard disk. So it is suggested that you check your hard disk and if it is damaged, change it immediately.
Installing Windows in Legacy Mode
For this follow these steps:
Step 1: Download Windows 10 ISO file in another computer.
Step 2: Using RUFUS utility, create a Windows 10 media for “MBR” partition scheme, by using the Windows ISO file.

Step 3: Plug the USB in and boot from the Legacy Boot USB drive you created and install your Windows.
Check Your RAM Memory
It is also one of the reasons why the 0x8007025D error might be coming to your Windows installation. So for this you can check your RAM and remove one RAM stick if you have two of them and try installing the Windows. Also you can try to replace your RAM and install Windows.
By Creating a 125GB Partition
To do this, follow the steps given below:
Step 1: From the Windows setup, select ‘Custom: Install Windows only (advanced)’.

Step 2: Delete all the partitions one by one.

Step 3: Click on ‘New” and create only one partition on drive with 120GB size.
Step 4: Try installing Windows in the new drive. Up on successful installation, you can expand the size of partition.
So these were some of the methods to fix 0x8007025D error in Windows 10. If you know about other methods, do let us know.
Read More About:
Directly in Your Inbox


