
The storage on your iPhone is full and you want to clear some memory but of course, you can’t delete all those photos or videos or other files.
If that’s not it, there are some confidential files or data for your work that should be kept stored because you can’t risk losing it. Perhaps, you want to factory reset your iPhone. Transferring data from your iPhone to Mac or say, vice versa, is the best avenue you can reach out to.
Don’t want to miss the best from TechLatest?
Set us as a preferred source in Google Search
and make sure you never miss our latest.
Turns out there are plenty of ways you can actually transfer files between iPhone and Mac so here’s what you should know about.
Best Ways To Transfer Files Between iPhone and Mac
Using iTunes (macOS 10.15 or earlier)
This is a more traditional approach towards transferring files between iPhone and Mac. Here, you would need iTunes installed on the Mac and a USB cable to connect both your phone and the Mac. Here’s how you can do it.
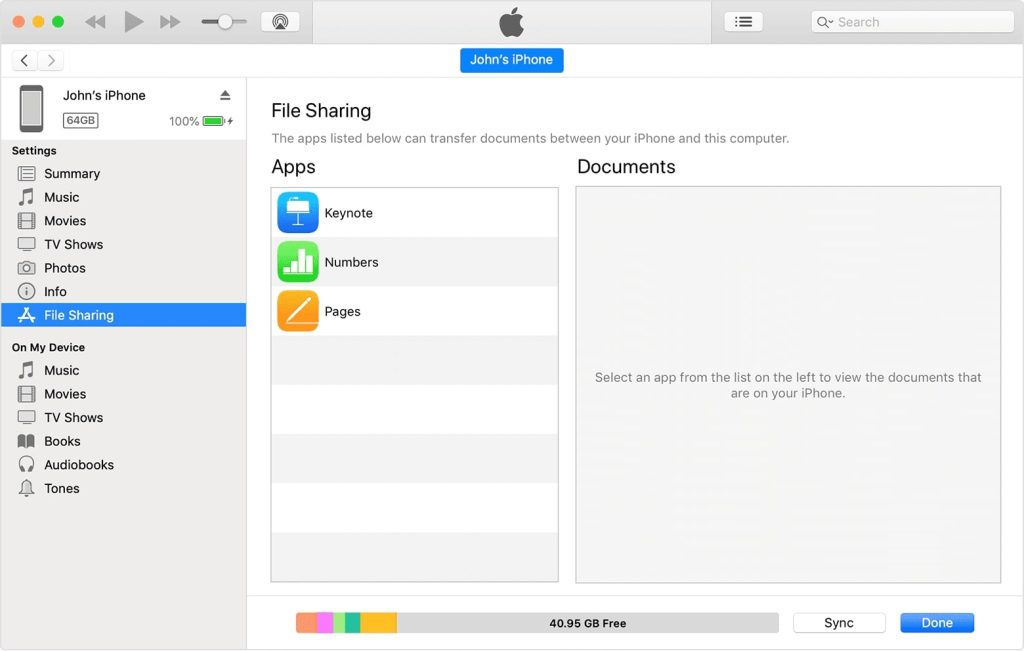
- First up, you’ll need to connect your iPhone to the Mac or Computer.
- Next up, open iTunes on your Mac and it should detect your iPhone automatically.
- On the top of the sidebar, click on the Device button and choose “File Sharing” from the options provided.
- Among the list of apps on the iTunes handle, select the app you want to use and start transferring data accordingly. You should be able to find options for “Photos”, “Movies” and others as well.
- Select the files you want to transfer from your iPhone to the Mac, right-click on tap on “Save To” and the storage should be your iPhone.
- If you are transferring data from Mac to iPhone, you can highlight the file, hit the “Add” button and that should do the trick.
Using Finder (macOS 10.15 or later)
Apart from using iTunes, newer versions of macOS users Finder app as well for transferring data to and fro. Here’s how it works.
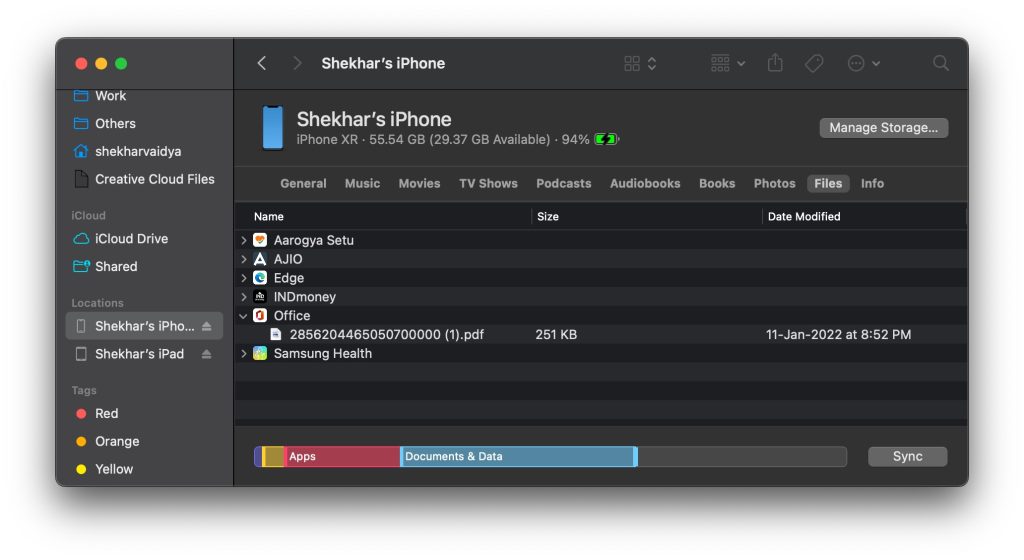
- First up, connect your iPhone to the Mac.
- If you have Wi-Fi syncing, you can set it up too.
- On the Finder app, find and tap on your iPhone.
- Next up, tap on Files.
- Now, you have a drag and drop interface that allows the transfer of data from Mac to iPhone or iPhone to Mac.
- For iPhone to Mac: Find the file you want to transfer and drag it to the Finder window.
- For Mac to iPhone: Use the drag and drop functionality to find files within the Finder window.
Using USB dongle and Image Capture
This works for the images stored on your iPhone that you want to backup on the Mac for XYZ reasons. You will need a dongle to connect your Mac to the USB cable and then your phone to commence the process. Here’s how it works.
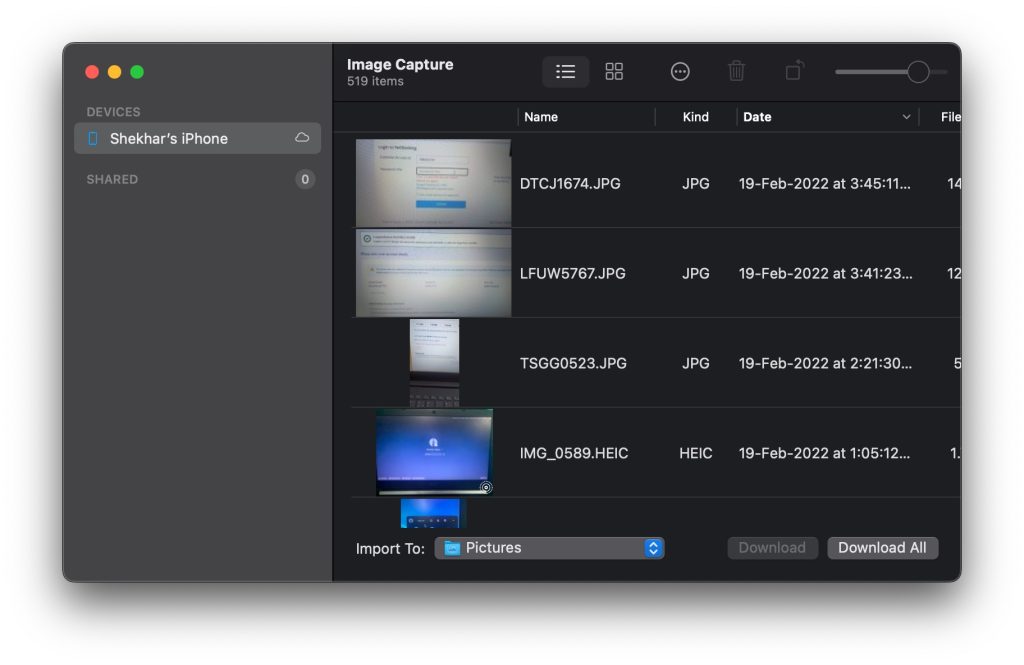
- First up, connect your phone to a USB cable to a dongle (to its USB port) to the Mac (which has a USB-C port) if it doesn’t allow connecting directly.
- Next up, open LaunchPad, search for Image Capture (Others >> Image Capture) and the app should automatically detect your iPhone.
- Press the power button or authenticate using Image Capture for further process.
- On your Mac, you should be able to get a list of all the photos. You can select one, many, or all and hit the “Import” or “Import All” button to get the images transferred to your Mac.
- That’s it.
Using Email
This is a rather basic yet useful way of transferring files between an iPhone and a Mac because it requires no additional app. All you need is access to the internet and the files although I would say the files should be small and less in quantity.
Here, open a new email, attach the files you want to transfer, and send it to yourself with a subject that tells you what the files are about just in case.
Since you have sent the files to yourself, now you can access them remotely across any device until you have the login credentials for the same.
You need to download the files on the Mac (assuming that you are transferring files from iPhone to Mac). You can use Wi-Fi to save on the data cost which will be relatively higher on mobile data. Note that you won’t be able to send larger files.
Using iCloud Drive
iCloud is a cloud storage where you can store a few gigabytes of data and access it remotely across various other devices.
In fact, you can access data concurrently and delete it from your local storage after backup thereby freeing up the local storage.
Your iPhone has iCloud and you can use it across Mac, Windows, and other systems to transfer data seamlessly.
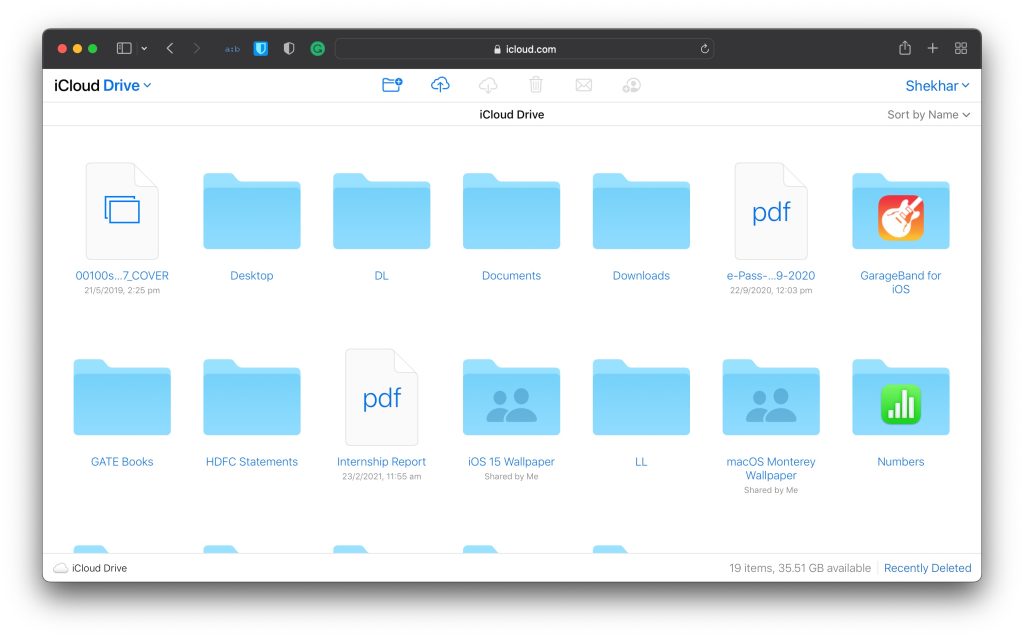
- First up, you need to store all the data on iCloud and sync it so that it is remotely available.
- On your iPhone, you need to go to Settings >> Tap on your name >> Turn ON iCloud Drive.
- On your Mac, go to the Apple menu >> System Preferences >> proceed to iCloud and turn ON iCloud Drive.
- Next up, upload the files onto the iCloud Drive that you want to transfer from iPhone to Mac and vice versa.
- Since you have backed up the files, you can delete them from the source’s local drive and access them on iCloud on the target device.
- You are left with downloading the individual files/folders on your Mac and that’s it.
Using AirDrop
You can transfer data from iPhone to Mac and vice versa using AirDrop which is an Apple technology that is created to enable sharing files across devices. Here’s how it works.
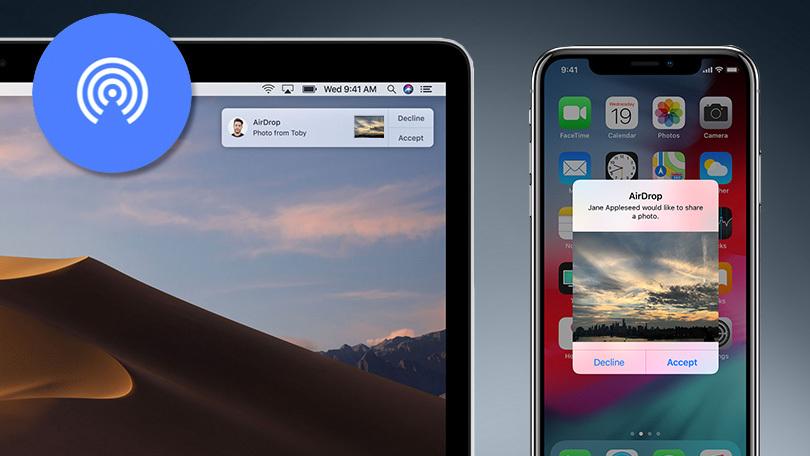
- On your Mac, tap on Go >> AirDrop listed on the Finder app to turn it ON.
- Now, turn on AirDrop on your iPhone via Control Center (swipe up on the home screen) and select “AirDrop”.
- Now, choose the app to share the files and it should be done seamlessly by following the on-screen instructions.
- You can change settings to allow receiving files from ‘Everyone’ or ‘Contacts Only’ and that should be done.
Using Dropbox or other cloud storage
Just like iCloud, Dropbox, Google Drive, are a few examples of cloud storage that you can use to sync data and access it remotely using any device such as on your Mac. Let’s see how you can actually do it.
Also, Read: 7 Best File Hosting Providers with Direct Download Link/Hotlink
- First up, install Google Drive or Dropbox on your iPhone and create an account.
- Use the same login credentials to use Dropbox or Drive on your Mac as well.
- All you have to do is manually upload the files you want to transfer, to the cloud storage. It could take a few minutes depending upon the size of the files and the internet speeds.
- Once you are done, you can use the Dropbox or Google Drive client on your Mac to have concurrent access.
- Since the files have been successfully uploaded to the drive, you can delete them from your iPhone’s local storage thereby freeing it.
- You will have to manually download each file on your Mac from the cloud storage and that’s the end of this process.
Wrapping Up
Perhaps these were some of the most popular methods on how you can transfer files between iPhone and Mac. Of course, there are simply too many options to choose from so pick the one that suits your current and anticipated requirements.
Enjoyed this article?
If TechLatest has helped you, consider supporting us with a one-time tip on Ko-fi. Every contribution keeps our work free and independent.
Support on Ko-fiDirectly in Your Inbox
")


