Highlights
- TWRP stands for Team Win Recovery Project, in which you create full system images and a lot more.
- You can set it as your custom recovery environment for flashing, installation of custom ROMs, etc.
- Let’s check more about what it is, including how to Install it and its drawbacks.
Android phones have a lot more added functionalities than iPhones. Hence, you would love to use it as certain aspects, like no SD card support and similar, keep you devoid. Being a passionate tech freak, you would always look to unlock more and more of your device functionalities.
Rooting is a crucial aspect you would often do, but it isn’t effortless. Without doing it, if you would want to install custom ROM or create partitioned backups with a touchscreen interface, then TWRP is something you would have heard often. So, if you want to know more about it, we have covered you all!
Don’t want to miss the best from TechLatest?
Set us as a preferred source in Google Search
and make sure you never miss our latest.
Content Table
What is TWRP?
TWRP, or Team Win Recovery Project, is an open-source custom recovery image, especially for Android smartphones. It replaces the original recovery menu on your phone and lets you perform several additional features like NANDroid backups and unlock advanced functionalities for stock recovery images.
TWRP is a custom recovery program that lets you perform various functions that the conventional recovery menu cannot do.
Most importantly, recovery programs don’t support touch interface, but TWRP lets you do so. You can install software and mods, which your phone doesn’t help, as it provides an easy interface for you to do so.
Moreover, from custom kernels to flashes to add-ons and themes, including ROMs, you can do it all. It is a straightforward graphical user interface for all your Android modification needs. Being open source, it is free to use and supports various Android phones. Most importantly, install the version suitable per your OEM model!
Can TWRP Be Installed Without Root?
Yes, you can install TWRP without rooting your Android. It’s just that you have to unlock the bootloader and then install it. As you flash functionalities, sideload firmware, and use system recovery images, it isn’t possible with a locked bootloader.
However, some companies like Oppo, Huawei, Nokia, and similar don’t let you unlock the bootloader. Therefore, you have to root it.
How to Install TWRP?
Before proceeding to Install TWRP on Android, ensure to have an ADB and Fastboot handy. Also, keep the device wholly updated before proceeding.
Step 1: Unlock Bootloader
- Go to Settings and navigate to About
- Locate the Build Number and tap the number 7 times to enable Developer options
- Go to Settings again and choose System
- Click Advanced and open Developer options
- Enable USB debugging
The developer options revoke functionality usually involves tapping 7 times, which sometimes varies depending on your OEM.
Thus, you would successfully unlock the bootloader.
Step 2: Download TWRP
The next step is to download TWRP, depending on your OEM. You can check the official website and then complete the process.
Step 3: Flash TWRP
TWRP, as the name implies, is a substitute for the stock recovery image of your OEM. Installing depends upon your phone model, as the partition scheme varies. You must check it using the ADB shell and execute the following command.
getprop ro.build.ab_updateUpon executing the command, your Android has A-only devices if it doesn’t return any value. While if it gives a “true” value, it has A/B partitions.
Case I: Devices with A-only Partition Scheme
You can directly set TWRP using Fastboot without additional processes when you have an A-only partition scheme.
- Copy the TWRP image from your device and move it to the Fastboot binary folder
- Open a command line tool like Command Prompt or Terminal and execute the following command:
adb reboot bootloader- Now rename the image to twrp.img and enter
fastboot flash recovery twrp.img fastboot rebootMost of the time, after restarting it, the device, by default, replaces custom recovery. However, it’s essential to avoid doing so! Therefore, find the key combination for your Android to enter recovery mode.
- After entering the command for fast boot, enter recovery mode and choose boot to TWRP
This will install TWRP recovery on your Android.
Case II: Devices with A/B Partition Scheme
The RE is clubbed with the boot image when you have an Android with an A/B partition scheme. Therefore, boot TWRP and afterward setup it up with the Recovery Environment.
- Move the TWRP image file to the Fastboot binary folder of the PC
- Open the Command Line tool and execute the following command:
adb reboot bootloader- Rename the image to twrp.img and enter the following for a temporary boot:
fastboot boot twrp.img- Now, copy the file to your phone at
adb push twrp.img /sdcard- Open the TWRP Advanced menu and select Install Recovery Ramdisk
- From the Android’s internal storage, select twrp.img
- Swipe the screen to install the image and restart your Android
Thus, you would complete installing the TWRP image file.
Case III: For Samsung Galaxy Phones
The Fastboot UI for Samsung smartphones differs from most others. Consequently, the TWRP installation process is different, irrespective of the partition scheme.
- Download Samsung’s Flash Tool (Odin) and extract it on your PC
- In it, download the TWRP *.tar image of your phone model
- Restart it on download mode
- Open Odin and flash the file in the AP slot
- Press the Volume Up and power buttons till Odin is flashing to enter the Recovery environment for TWRP
- Reprogram Multidisabler to partially disable your OEM protection features and services on the modded device
Most Androids, if not obsolete versions have an in-built Verified Boot feature called AVB. The drawback is that it doesn’t restart your device after modding it. Therefore, you should cross it and program a blank vbmeta image. TWRP recovery will prompt you to follow specific instructions for it.
Step 4: Verification
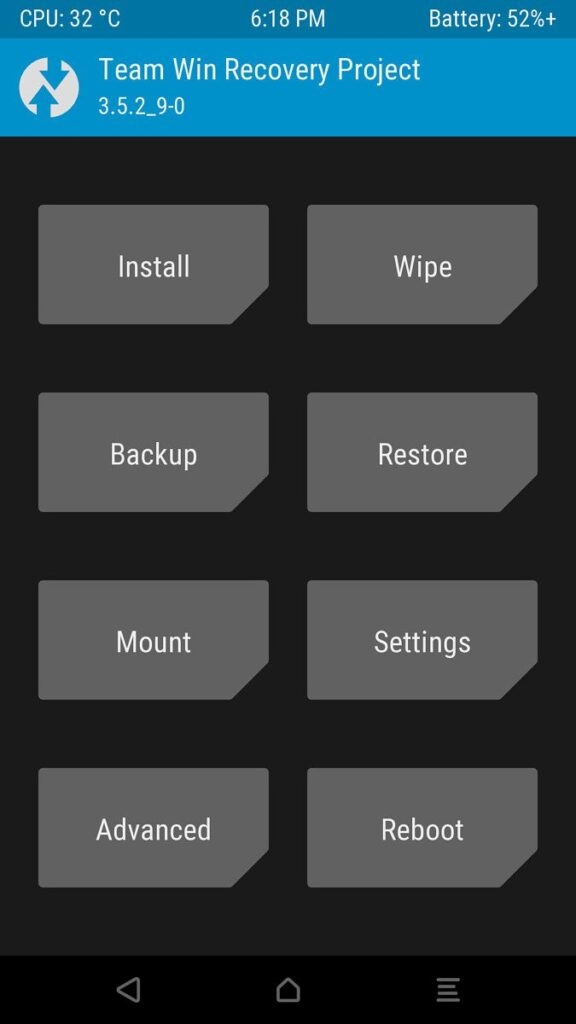
The process doesn’t stop on installation. Therefore, you should verify that the recovery environment is fully functional. For it, boot into the recovery mode and check if it works like the one below! If yes, then it’s optimally functional. Slight variations are certain as the version varies for each OEM.
Similar to application and system software, it is essential to keep updating TWRP timely. You don’t always have to manually download the latest version by following a series of steps.
Therefore, download the TWRP official app from PlayStore, which will notify you of updates you can install. Besides, if you have already rooted your Android, you can download and install the RE directly from the app.
Features of TWRP
There is a horde of reasons why people opt for TWRP. It not only creates a recovery environment but has several more benefits.
1. Install Flash Packages
The TWRP lets you install flash packages easily to your Android, provided you have unlocked the bootloader. The flash (reprogramming packages) are in the format of .zip files. These already contain a script, so it knows how to execute the flash package.
Thus, by sideloading these files, you can do almost anything you want. These include customizing themes, unlocking a high-priority app, animating the boot interface, fixing the boot image, rooting your device, etc.
You can even install a custom ROM or a higher version of Android, which your device otherwise doesn’t support. Some people use it for rolling back to an older version of Android.
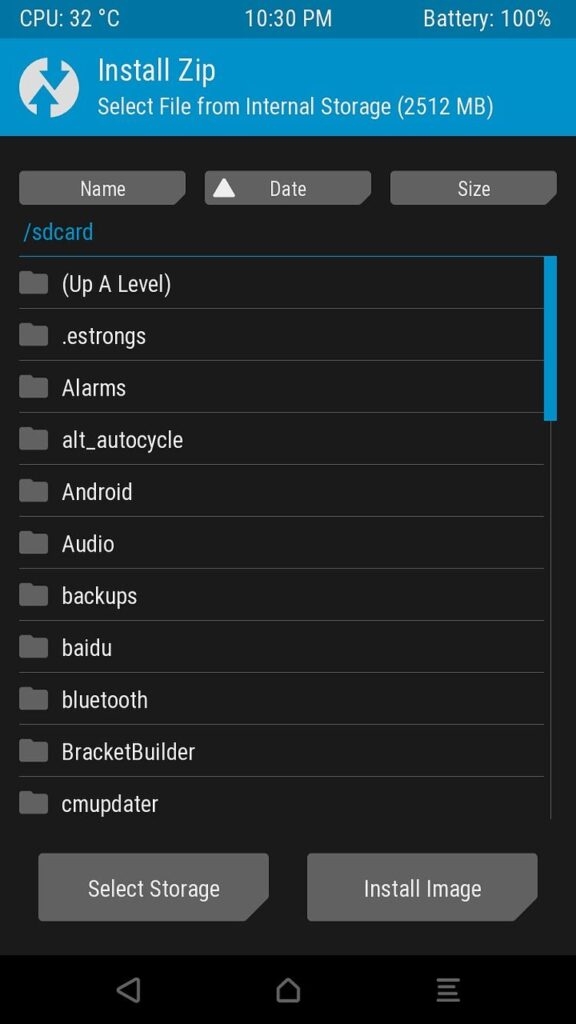
2. Flash using IMG Files
Flash packages involve using ZIP files. TWRP lets you bypass it and use IMG files instead. Besides, you can also install a Generic system Image instead of a custom ROM image. Thus, you can recover your stock boot image. Moreover, it also allows you to update the program from the Recovery program and not follow a complex procedure.
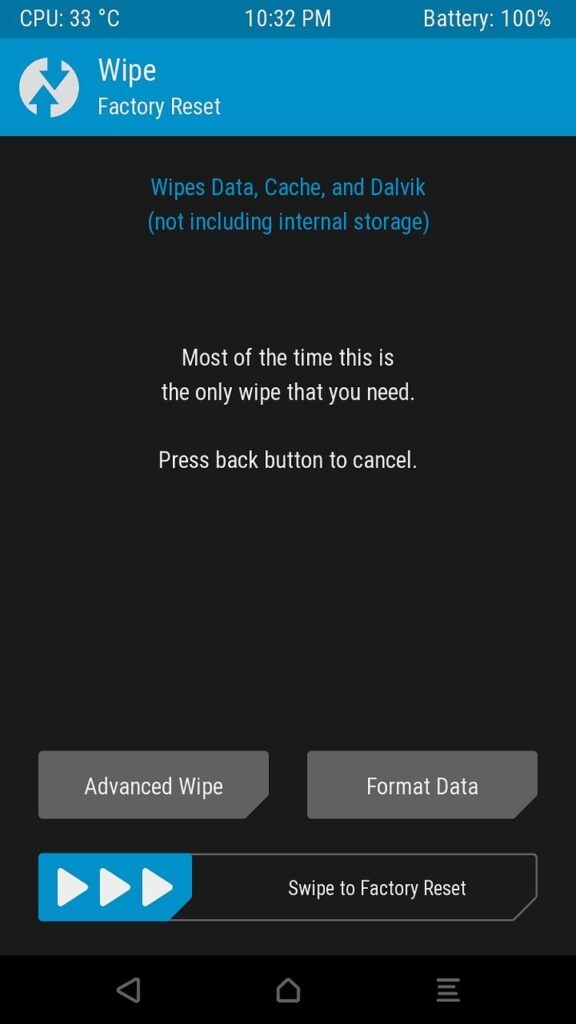
3. Wipe
As the name suggests, you can Wipe your phone using TWRP. It differs from the conventional wipe feature, which involves using a Factory Reset.
This one instead wipes the recovery partition. Further, you can even choose to wipe selected partitions on your Android. Thus, you can even wipe the partition where Android software is present.
Before installing custom ROM, if you wish to erase the system partition of your OEM, then you can do that, too. Additionally, you can also wipe partitions that contain cache.
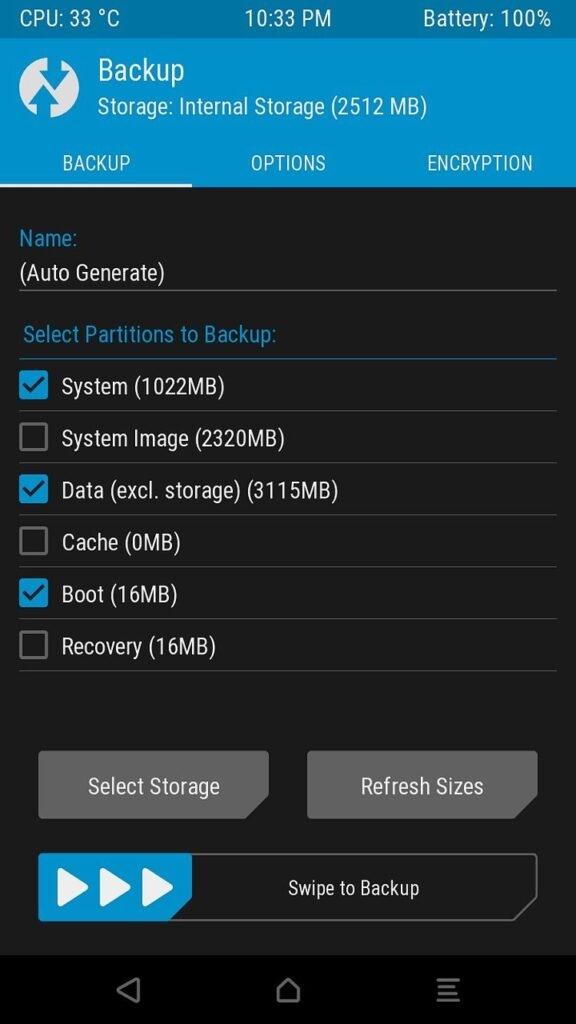
The best part is that you can create a backup of any chosen partition, not the entire device. This system is called as NANDroid backup. Furthermore, you can restore it anytime you want.
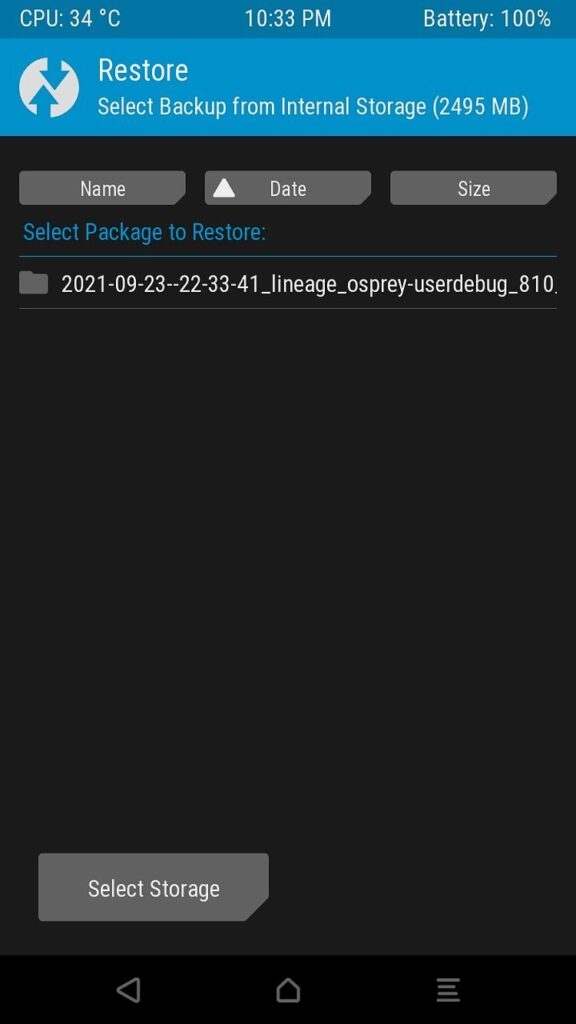
4. Restoring Backup
When you have a backup system partition, then you can restore it. You can use it to recover NANDroid backup and functionality.
5. Mount
The feature lets you mount and unmount system or custom partitions manually. Thus, mounting it allows you to access its data and edit/input/delete data as required.
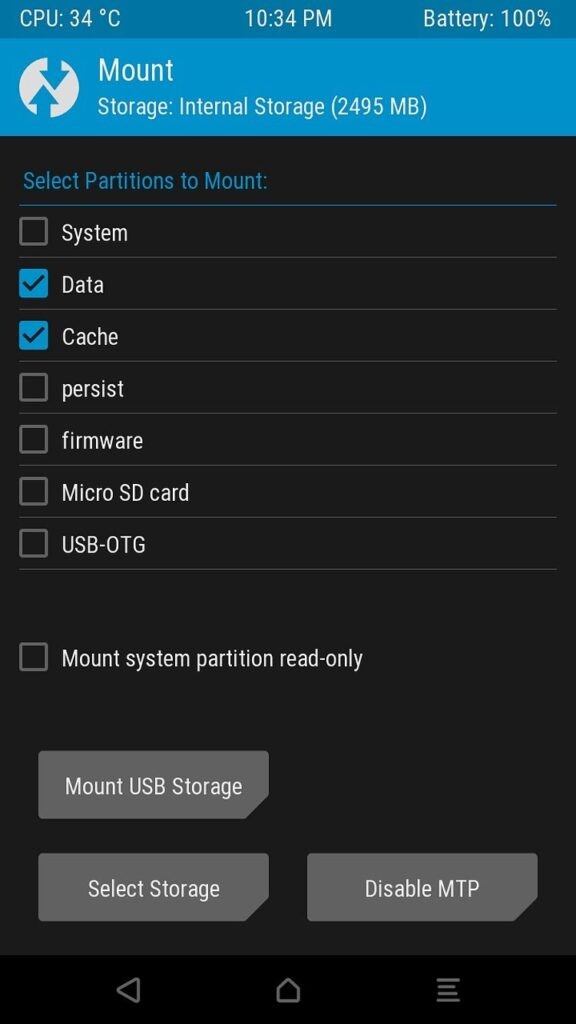
Mounting is crucial for TWRP to sideload packages. Fortunately, you don’t always need to mount/unmount packages, as most ZIP files will do it themselves.
Further, TWRP settings have plenty of features to enable/disable NANDroid backups, customize UI/UX, modify vibrations, etc.
Further, using rm -rf rather than custom formatting doesn’t affect the TWRP feature, but slight changes can occur. These depend upon the Android model.
6. Advanced
The Advanced menu has multiple features apart from the ones mentioned above. Whether ADB sideloads instead of conventional flashing and bypassing terminal/File manager, these are a great help!
Besides, it has many additional functions that the device doesn’t support otherwise. Flashing ROMs and custom ROMs is much easier with it.
7. Multiple Reboot Options
The TWRP feature also has a Reboot menu. It differs from the conventional ones, instead of rebooting to system software. You would have options like fastboot, recovery mode, and lots more.
What We Like About TWRP?
TWRP is one of the most popular recovery environment programs.
- It has a community of developers who are always ready to help provide support whenever necessary
- Being open-source, there are several versions of enhanced features
- Provides dual boot mods
- You can install TWRP even without rooting
What We Dislike About TWRP?
There are several drawbacks associated with TWRP, which often become overwhelming at times.
- You have to unlock the bootloader to set TWRP as the stock recovery program
- Installing TWRP will veil the warranty associated with your device
- Sometimes, it makes the device unstable, especially when not installed aptly
Is TWRP Safe?
TWRP is an active community of budding and mature developers. They do their best to instill the latest possible features. Furthermore, being open source, it has advanced security features.
However, being open source, its source code is accessible to everyone; thus, anyone can crack it. Despite all these, no such concerns have been reported in the past, so it’s safe.
But, installing TWRP can harm your device if you don’t follow the procedure carefully. Besides, since you unlock the bootloader or have already rooted Android, it can sometimes make your device unstable. It happens if your phone’s condition is not good.
The Bottom Line
TWRP, or Team Win Recovery Project, is a free and open-source custom recovery tool for Android smartphones. It replaces the original recovery menu and offers features like backups, advanced functionalities, and touch support.
With TWRP, you can easily install software, mods, custom kernels, and even change themes. It’s a user-friendly interface that supports various Android devices, but choose the correct version for your specific phone model.
TWRP simplifies Android modifications and empowers you to personalize and enhance your devices.
Further Reading:
Enjoyed this article?
If TechLatest has helped you, consider supporting us with a one-time tip on Ko-fi. Every contribution keeps our work free and independent.
Support on Ko-fiDirectly in Your Inbox


