The outlook data file cannot be accessed error message is seen while using Outlook 10, or 13 on Windows OS. You will see this error message while sending or receiving an email using Microsoft Outlook or Outlook Express.
Due to this Outlook data file cannot be accessed message, you can’t send or receive any email or messages in your outlook.
Outlook is one of the best services from Microsoft that allows users to manage emails faster by providing great features.
However, some users are facing issues with Outlook. One of these issues is not able to access or send your personal data file.
The original error message is, 0x8004010F: Outlook data file cannot be accessed.
When this error occurs, you won’t be able to send or receive emails and Outlook keeps displaying the error on your screen when you try to send a message. This is really annoying when you are in the middle of some important work.
Causes of Outlook data file cannot be accessed Error?
The main reasons for this Outlook data file cannot be accessed error are, corrupt Outlook profile or inaccessible Outlook data files (OST or PST).
When Outlook is set up with an Exchange or IMAP email account, an OST file is created on the PC. When you add a POP account to Outlook, a PST file is created.
These Outlook data files (OST and PST) include a synchronized copy of all email server mailbox data. In short, an OST or PST file is a local copy of the user’s inbox, containing all email, attachments, contacts, notes, calendar items, etc.
OST allows users to access Outlook even if the system is unavailable or the Exchange server is down or busy. In such instances, users can work uninterruptedly on Outlook.
Changes made to the account or emails sent from Outlook are stored locally in the OST file and synchronized with the server’s mailbox whenever the system connects to the Exchange server.
However, users face problems while trying to access their mailbox data using the Outlook data file. Problems with the OST or PST file can trigger such errors. Problems with the OST or PST file frequently cause mailbox access and send/receive failures.

How to Fix Outlook Data File Cannot Be Accessed Error?
You can fix this issue on your own. In this article, we are going to share a complete guide to fixing Outlook Data File Cannot Be Accessed error on Windows 10 & 11.
Method 1: Restart Outlook and Check Internet Connection
The first step to fix the data file cannot be accessed error is to restart your Outlook app. When you see this error, just close the Outlook App.
Open Task Manager using CTRL + SHIFT + ESC and force stop Outlook service.
Then restart your computer and then open Outlook again.
Try to send a mail and see if it is working or not.
Method 2: Check Account Settings
The next method is to check your account settings. Make sure that your account settings are correct. You can use Outlook Web App to check your settings. This will check every setting and check connection issues.
If you can successfully log in with OWA then the issue is something different.
Method 3: Create a New Outlook Profile using Auto Account
As we mentioned above, a corrupt Outlook profile could be the reason for the 0x8004010F outlook error. To fix this error, you have to create a new Outlook profile. Here are the steps to create a new Outlook profile.
Step 1: Open the Start menu and then search for the Control Panel.

Step 2: In the control panel, select large icons in the View by option.
Step 3: Find mail and click on it. This will open a Mail setup window.

Step 4: Click on Show Profiles.

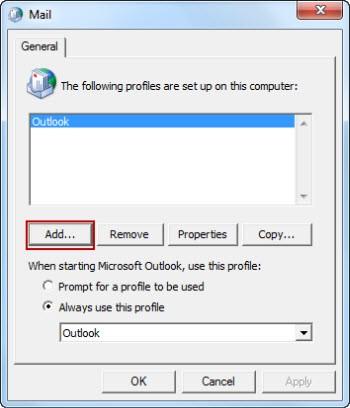
Step 5: Click Add to create a new Outlook profile.

Step 6: Enter a name in the ‘Profile Name:’ and then click on Ok.

Step 7: Enter other required details like name, email, and password in the add account window and then click on Next.

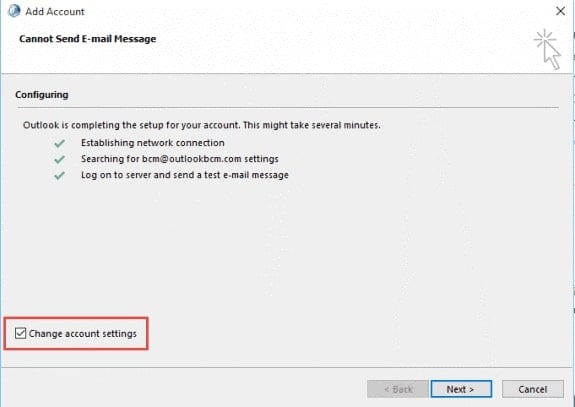
Step 8: Enable the option called Change account settings and then click on Next.
Step 9: Select the old profile and then click on Remove.
Step 10: Choose the “Always use this profile” button and select a new profile name from the dropdown.
Finally, click Ok to save the profile and restart your Outlook for new changes.
Using Windows Settings:
You can also create a new Outlook profile using Windows 10 or 11 Settings.
Open Windows settings with Windows + I key on your keyboard and then Go to Accounts > Email & accounts.

Here Add a new Outlook profile.
Method 4: Move the data file to the default location
Many users have reported that moving the data file to another location can fix the issue. Some have also reported that moving the file didn’t solve the issue but again moving the data file to its original location and restarting your computer can fix the issue.
Method 5: Use Repair
You can also repair your Outlook data profiles. To do this, go to Control Panel > Mail, and select the Repair option.
Wait for some time till it is working. Once done, restart your Outlook and see if you are still facing the same error or not.
Method 6: Check the delivery location
According to some users, you can face the 0x8004010F Outlook data file cannot be accessed error if your delivery location is wrong. To fix the issue, you have to manually change the location and set it to Personal FolderInbox.
To do this, go to Account Settings > Email accounts and click the Change Location button.
Enter the correct delivery location.
Method 7: Manually Setup Email Account
If you are still facing the same error, then try to set up a new create a POP3 account manually. Here are the steps to do it.
Step 1: Open Control panel > select large in view by option and then select Mail.
Step 2: Click Show Profiles and then click on Add button.
Step 3: Type a new profile name and click OK.

Step 4: Select Manually configure server settings and then click Next.

Step 5: Select POP, IMAP, or Internet E-mail > Next.
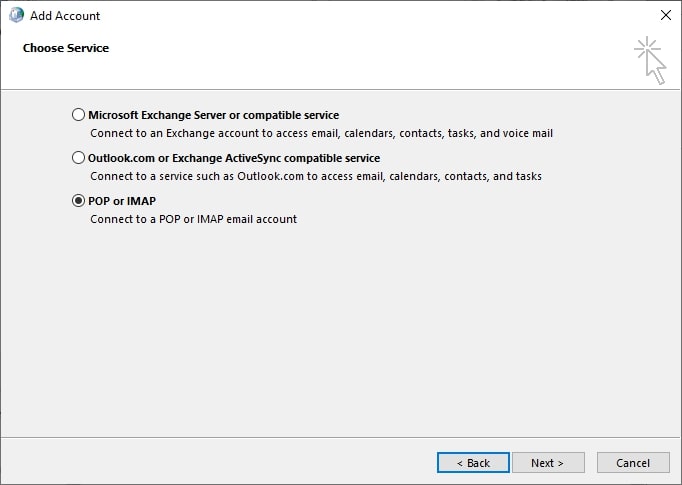
Step 6: Enter your account details > click on Test Account Settings to check your account.

Step 7: Select the Existing Outlook Data File option > click Browse to select the existing PST file.

Step 8: Click Next > Close and then Finish.
Now try to send a new mail using Outlook and see if it is working or not.
Method 8: Make sure that you have ownership over the data file
You will need ownership over that file to send it using Outlook. To verify it, follow these steps.
Step 1: Find your file and right-click on it.
Step 2: Choose properties and then go to the Security tab.

Step 3: Then click on the Advanced button.
Step 4: Check the Owner section. If the owner is set to an unknown user name, click on the change.

Step 5: In the Enter the object name to select option, enter your user name and click Check Names.

Step 6: If your user name is correct, click OK. Also, provide full control of your user account.
Step 7: Click on Apply and then save changes.
If the issue was due to an ownership issue, then this will fix it.
Directly in Your Inbox

