The updates on Windows 10 are automatic and smooth(for most of the time) but one of the errors that can give you problems in this smooth operation is the 0x80070026 error. When updating your Windows, you might get this error, and there some easy ways to fix 0x80070026 error in Windows 10.
In this article, we are going to show you how to fix 0x80070026 error in Windows 10 using some simple and easy steps.
Fix 0x80070026 Error in Windows 10
By Using the sfc Command
Step 1: Go to the Windows search bar and type “cmd”, right-click on it to ‘Run as administrator’.

Step 2: Now enter the following command,
sfc /scannow, and hit enter.
Let the scan complete, upon completion, restart your system.
By Running the Troubleshooter
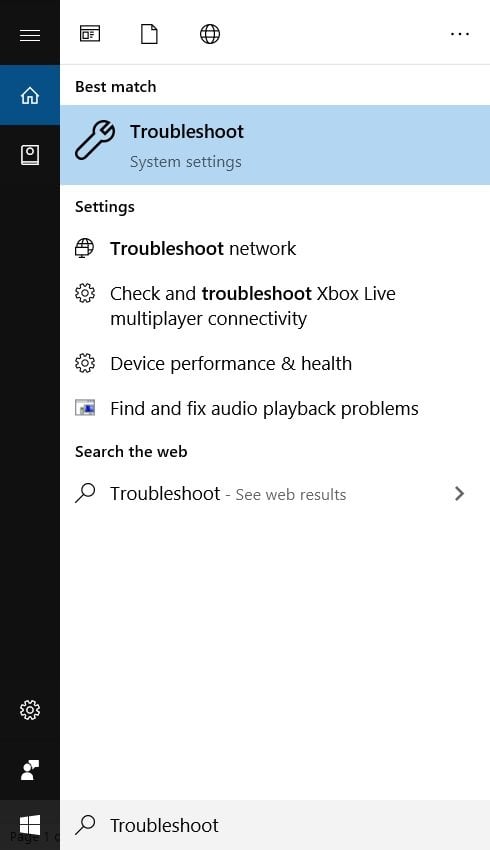
Step 1: Go to the Windows search bar and type, “Troubleshoot”, and hit enter.

Step 2: Select ‘Windows Update’ troubleshooter from the list. If you do not see the option for Windows Update troubleshooter, navigate to ‘Additional troubleshooters’, and click on it and you will find the ‘Windows Update’ troubleshooter.

Step 3: Now run the troubleshooter and try applying the fixes which the troubleshooter suggests for you.
This shall fix the problem for you.
By Running DISM Scans
Step 1: Go to the Windows search bar and type, “cmd”, right-click on it to ‘Run as administrator’.
Step 2: In the command prompt type the following command,
Dism /online /cleanup-image /ScanHealth, and hit enter.
Step 3: Now enter the following command,
Dism /online /cleanup-image /CheckHealth, and hit enter.
Step 4: Run the following command,
Dism online /cleanup-image /RestoreHealth, and hit enter.
That’s it now reboot your system and this shall fix the problem for you.
By Deleting Content of Temp Folder
Step 1: Make sure that you are logged in with the administrator account.
Step 2: Go to ‘This PC’ and open ‘C:’ drive or the drive in which the Windows is installed.
Step 3: Go to ‘Users’ folder, and open ‘itnota’ folder.
Step 4: Go to ‘AppData’, then open ‘Local’.
Step 5: Open the ‘Temp’ folder and delete all the contents by selecting all using the ‘ctrl+A’ key.
Note: Make sure to create a backup of all the essential files and folders.
That’s it and this shall fix the problem for you.
By Resetting the PC
Step 1: Go to the Windows search bar, type “Settings”, and hit enter.

Step 2: Now go to ‘Update & Security’.

Step 3: From the left side, navigate to ‘Recovery’, and click on ‘Get Started’.

Now just follow the screen instructions that will help resetting your PC, upon a successful resetting of the PC, try updating the Windows again.
By Resetting the Windows Update Components
Step 1: Go to the Windows search bar, type “cmd”, and right-click on it to ‘Run as administrator’.
Step 2: Now type the following four commands and hit enter after each one:
net stop wuauservnet stop cryptSvcnet stop bitsnet stop msiserverStep 3: Now we have to rename SoftwareDistribution and Catroot folder and for that type the following commands in Command Prompt and press enter after each one:
Ren C:\Windows\SoftwareDistribution SoftwareDistribution.oldRen C:\Windows\System32\catroot2 Catroot2.oldStep 4: Now type the following four commands and hit enter after each one:
net start wuauserv
net start cryptSvc
net start bits
net start msiserver
Now close the Command Prompt and reboot your system.
So these were some of the ways by which you can fix 0x80070026 error in Windows 10. Do try these methods and let us know in the comments if you face a problem in any of the method(s) or step(s).
Directly in Your Inbox


![[Solved] Windows Update Error Code 0xc1900223 Windows 10 Update Featured](https://tech-latest.com/wp-content/uploads/2021/12/Windows-10-Update-Featured-300x225.jpeg)


