
If you are also that curious tech enthusiast who always tries something new and does experiments with his device by using and testing the latest features and functioning. If you are also interested in customizing your Android device to have a brand-new look. So for sure, you are also trying to install Substratum themes on Android 10/Q, most of the Android 10 users have a doubt regarding how to install Substratum themes on the latest Android version, i.e. Android 10/Q right now (Android 11 is in its beta version and yet to be released).
So, if you are also confused or have any doubts regarding installing the substratum theme on your Android device (especially Android 10/Q). So, don’t worry, here in this article we are going to guide how you can install substratum themes on Android 10/Q. So, let’s get started
Substratum
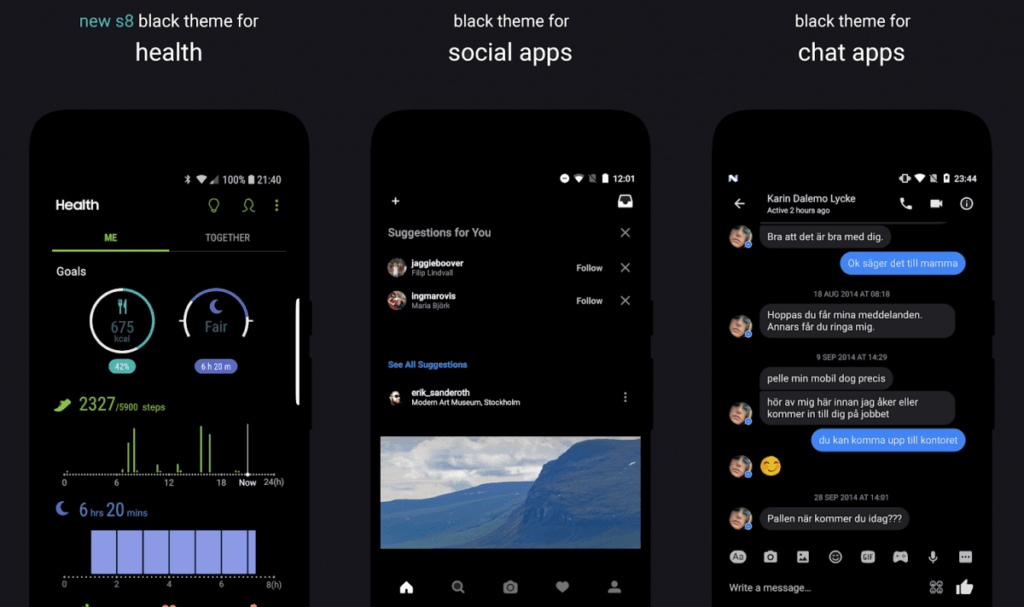
A substratum is a theming tool that can be used to apply various themes with or without rooting. The Substratum theme is started with an extremely popular custom ROM Cyanogen Mod, which has a theming engine that made it so easy to apply themes. However, Cyanogen Mod has failed and not in use anymore, but somehow Substratum theme rises from there and becomes an immensely popular theming engine.
At first, it was used for rooted devices only, but after Android 8/Oreo came into the picture, the Substratum theme can also be used without root. Again, with Android 9/Pie Google said that OMS (Overlay Manager Service) is intended to be used by device manufacturers only, so OMS in the current form is not designed to be a generic feature.
Don’t want to miss the best from TechLatest?
Set us as a preferred source in Google Search
and make sure you never miss our latest.
Then Again, with Android 10/Q Google has changed so many features and other things, and most of them are related to the internals of the system. Android Q itself provides various features and customization options, so Android 10 has eliminated the need for a substratum theme, but the substratum theme is so much better and has many customization options than Android 10 in some aspects. So, let’s get started and install substratum themes in Android 10/Q with root.
Also Read: How to Install ViPER4Android on Android 10/Q
How to Install Substratum Themes on Android 10/Q
Before you Start
Before getting started with the installation procedure, here are some important instructions you should know and follow before getting started with the method to install substratum themes on Android 10/Q
- First of all, before starting to install substratum themes on Android 10/Q, make sure that your device is rooted using Magisk, running on Android version 10/Q.
- Install Substratum Lite.
- Install any Android 10 compatible theme.
Related Article
- How to Root Your Android Device
- [Top]10 Best Magisk Modules For Your Rooted Phone
- Why Magisk Over SuperSU for Rooting your Android Device?
Some Android 10 Compatible Substratum Theme
You should first purchase a compatible theme to install substratum themes on Android 10/Q. Here is some best substratum themes, you can purchase and install them from the Play store.
Outline
Ethereal
Valerie
Flux White
PitchBlack
Also Read: How to Enable Always-on Display on Any OnePlus Phone
Method
This is a complete step-by-step guide, by following each step carefully this you can easily install substratum themes on Android 10/Q, and also set up the theme in the device.
- Make sure your device is rooted and running on Android 10/Q.
- Go to Google PlayStore, and install any of the themes of your choice. (In this article, we are using Pitch Black theme)
- Download and Install the Substratum from the Google Play Store.
- Open the Substratum app from the app drawer.
- It will ask you for Superuser permission, grant the permission.
- If it doesn’t ask superuser permission or somehow you unable to grant the permission
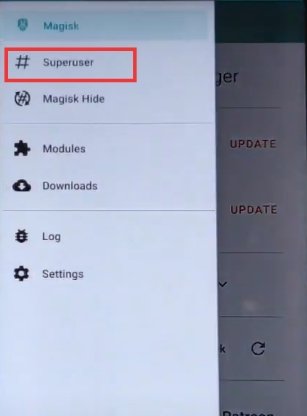
- So, open the Magisk Manager.
- Tap on hamburger menu from the top-left corner and go to Superuser.
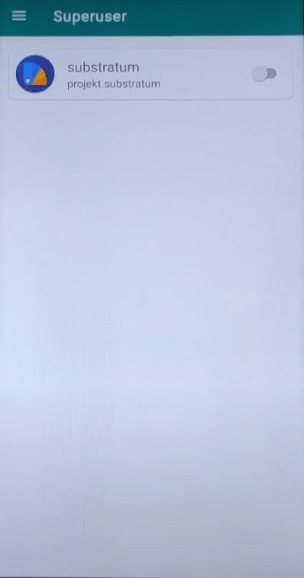
- Enable the toggle on in front of Substratum (if it was disabled).
Also Read: How to Fix Magisk Install Error 1 in TWRP Recovery
- Clear all the recent apps, from the background.
- Again, Open Substratum, A welcome screen will be displayed (skip it if you want)
- Allow all the required permission.
- And here, you will see the theme which you have purchased and installed from the Play Store.
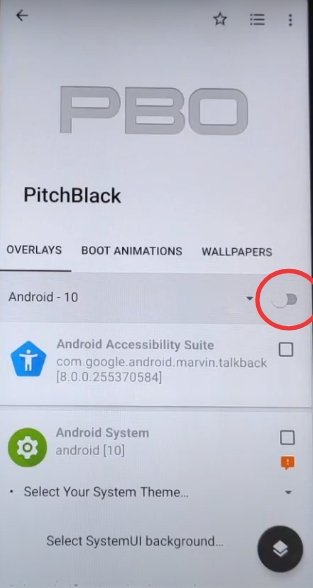
- Click on the theme.
- In the Overlay tab, click on the arrow (facing downward) select Android 10 from it.
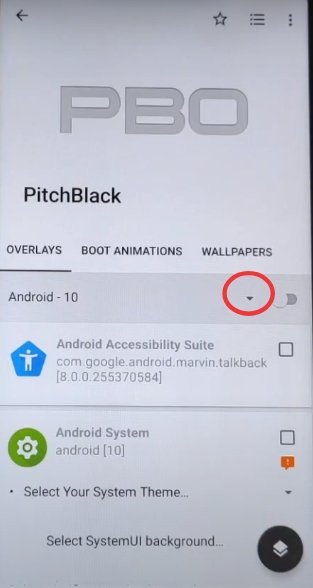
- Enable the Toggle just beside the arrow, it will select all the app.
Also Read: How to Fix Error 70 While Installing Gapps in TWRP
- Or you can manually choose the apps from the app list below.
- Make suitable customization.
- After customizations, tap on the circular icon at the bottom-right corner.
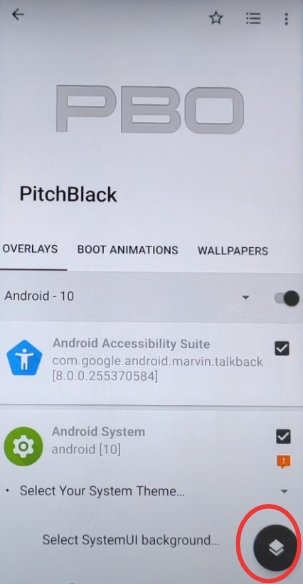
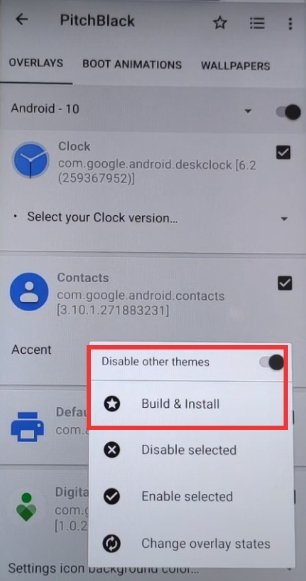
- Here, enables the toggle in front of Disable other themes, to avoid conflict between themes. (You can always perform experiments so you can also disable it).
- Now tap on Build and Install.
Also Read: How to Fix Error 7 in TWRP While Flashing any Custom ROM?
- It will take a while to overlay all the apps.
- After successful building and installing, reboot your device.
- After rebooting, open the substratum again.
- Go to the manager tab.
- Enable the toggle on in front of Select to bottom all overlays (or choose the apps manually). To apply the theme in respective apps.
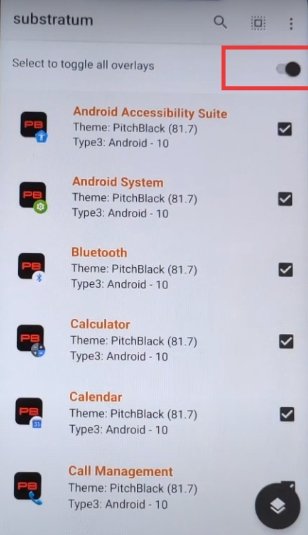
- Again, tap on the circular icon at the bottom-right corner.
- Tap on Change overlay states.
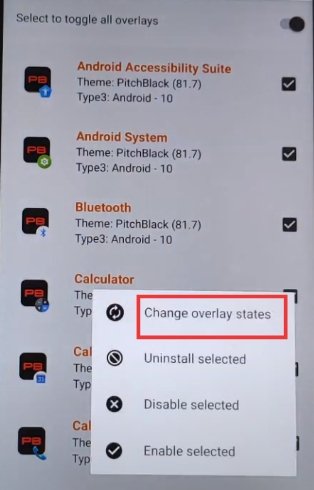
- It will reboot the system UI automatically.
- Now if you unlock your device, so all the changes would be saved.
That’s it from our side and I hope you have successfully installed substratum themes on Android 10/Q. If you like the content and found this article useful so, please share your valuable reviews in the comment box. Also, if you have some more suggestions so please let us know in the comment section.
Enjoyed this article?
If TechLatest has helped you, consider supporting us with a one-time tip on Ko-fi. Every contribution keeps our work free and independent.
Support on Ko-fiDirectly in Your Inbox


